Troubleshooting Microfluidic-Mammalian Cell Culture Integration: A Practical Guide for Robust Experimentation
Integrating mammalian cell culture with microfluidic technology offers unparalleled control over the cellular microenvironment but presents significant technical challenges that can hinder adoption and reproducibility.
Troubleshooting Microfluidic-Mammalian Cell Culture Integration: A Practical Guide for Robust Experimentation
Abstract
Integrating mammalian cell culture with microfluidic technology offers unparalleled control over the cellular microenvironment but presents significant technical challenges that can hinder adoption and reproducibility. This article provides a comprehensive, solutions-oriented guide for researchers and drug development professionals. It covers foundational principles of device selection, explores advanced methodological applications for long-term culture and dynamic stimulation, and delivers a systematic troubleshooting framework for common issues like bubble formation, cell viability, and contamination. By synthesizing current best practices and validation strategies, this guide aims to demystify the integration process, enhance experimental success, and accelerate the development of more physiologically relevant in vitro models for biomedical research.
Core Principles and Strategic Advantages of Microfluidic Cell Culture
Why Microfluidics? Overcoming the Limitations of Traditional 2D and 3D Cultures
Traditional cell culture methods have long been the foundation of biological research, but they come with significant limitations. Two-dimensional (2D) cultures, while simple and cost-effective, fail to replicate the complex three-dimensional environment of human tissues [1]. Although three-dimensional (3D) cultures provide more physiologically relevant models, they can be cumbersome, expensive, and challenging to analyze [2]. Microfluidic technology, particularly digital microfluidics (DMF), has emerged as a transformative platform that addresses these limitations while introducing new capabilities for precision control, automation, and analysis of mammalian cell cultures [3] [4].
Microfluidic devices enable researchers to conduct highly controlled cell culture experiments using remarkably small volumes (typically 0.01 to 1 mL) of chemical media and reagents [5]. This miniaturization not only reduces costs but also allows for the creation of more physiologically relevant microenvironments. The integration of microfluidics with both 2D and 3D culture systems represents a significant advancement in our ability to study cell signaling, drug responses, and tissue-level behaviors in vitro [4] [1].
Table: Comparison of Cell Culture Platforms
| Platform | Advantages | Disadvantages |
|---|---|---|
| Traditional 2D Culture | Simple, cost-effective, well-established, easy observation [4] [1] | Lacks physiological relevance, limited cell-cell interactions, poor predictive value for drug responses [4] [1] |
| 3D Culture (Spheroids, Organoids) | Better mimics in vivo conditions, improved cell signaling, more physiologically relevant [4] [2] | More complex, higher costs, variability in results, challenges in nutrient distribution and analysis [4] [2] [1] |
| Conventional Microfluidic Chips | Precise microenvironment control, enables real-time monitoring, reduces reagent consumption [5] | Requires complex connections, specific equipment (pumps, valves), complex fabrication [4] |
| Digital Microfluidics (DMF) | Automated droplet handling, low reagent consumption, scalable, enables high-throughput screening, no pumps or valves required [3] [4] | Limited adoption in biology, requires expertise in microfabrication and programming, potential magnetic field effects on sensitive cells [4] |
| Animal Models | Physiological relevance, whole-organism interactions | Ethical concerns, high costs, time-consuming, species differences [4] |
Technical Support Center
Troubleshooting Guide: Common Experimental Challenges
Issue 1: Poor Cell Viability in Microfluidic Chambers
Potential Causes and Solutions:
- Shear Stress: Design devices with integrated cell-trapping chambers that minimize shear and compressive stress. Vacuum-assisted loading systems can protect cells during introduction to the device [6].
- Material Incompatibility: Ensure proper device preparation using compatible materials. For PDMS devices, use Alconox detergent for cleaning followed by 70% ethanol sterilization [5].
- Nutrient Depletion: Implement continuous perfusion systems using software-controlled syringe pumps to maintain nutrient supply and waste removal during long-term culture [6].
Issue 2: Bubble Formation in Microfluidic Channels
Prevention and Resolution:
- Proper Wetting Protocol: Carefully manage the chip wetting process. Start with high flow rates (6-10 mL/h) to fill the entire device before sealing unused inlets with knotted tubing [6].
- Flow Rate Balancing: When dynamically changing fluid concentrations, balance flow rates at junction points to prevent back flow. For example, if the total flow rate at inlets 1 and 2 is 100 µL/h, the total flow rate at inlets 3 and 4 should also equal 100 µL/h [6].
Issue 3: Non-uniform Cell Distribution in Chambers
Optimization Strategies:
- Distribution Network Design: Avoid simple binary tree networks which create large differences in cell density. Implement a two-level branching network with "sacrificial" chambers at peripheral channels to ensure uniform cell distribution in experimental chambers [5].
- Channel Geometry: Utilize "fanlike" distribution networks rather than binary tree topologies, except when specifically studying cell density effects [5].
Issue 4: Evaporation in Digital Microfluidic Platforms
Mitigation Approaches:
- Device Architecture: Ensure proper enclosure of droplets in DMF systems with top plates to control evaporation during live culture imaging [4].
- Humidity Control: Maintain adequate environmental humidity, particularly for printed circuit board (PCB)-based platforms which can be humidity-intolerant [4].
Issue 5: Biofouling and Contamination
Preventive Measures:
- Surface Modifications: Apply appropriate hydrophobic coatings (Teflon AF, FluoroPel, or Cytop) to reduce biofouling on DMF device surfaces [4].
- Device Reusability: Consider "push-down" valve designs instead of "push-up" configurations, as they allow easier cleaning by enabling the PDMS to be peeled off the glass coverslip for thorough cleaning [5].
Frequently Asked Questions (FAQs)
Q: How does microfluidics enable better study of cell signaling compared to traditional methods? A: Microfluidic devices allow quantitative analysis of signaling networks at the single-cell level with subcellular resolution, overcoming limitations of population-average measurements that mask individual cell behaviors. They enable precise temporal stimulation and high-content imaging through immunocytochemistry, providing spatial and temporal information about key signaling proteins that flow cytometry cannot offer [5].
Q: Can microfluidic devices support long-term mammalian cell culture? A: Yes, advanced microfluidic systems have demonstrated the capability to support mammalian cell culture for extended periods, with some DMF platforms maintaining cultures for up to 60 days—sufficient for complex organ-on-chip models like liver cultures and immunology studies [4].
Q: What types of analysis can be performed with cells cultured in microfluidic devices? A: Microfluidic platforms support various analytical techniques including high-content imaging, immunostaining, real-time monitoring of cellular responses, and integration with biosensors. The confined volume of microfluidic chambers also increases concentration of secreted signals, making them advantageous for studying autocrine and paracrine signaling systems [5] [4].
Q: How does digital microfluidics (DMF) differ from conventional microfluidic chips? A: DMF uses arrays of microelectrodes to manipulate individual droplets without the need for pumps, valves, or physical channels. This eliminates dead volumes and enables precise control over droplet-based microenvironments. DMF allows automated handling of sub-microliter volumes and can perform passive media exchange with reduced cell disruption [3] [4].
Q: What are the key considerations when designing a microfluidic device for cell culture? A: Critical design factors include: choosing appropriate materials (e.g., PDMS, glass); implementing proper distribution networks for uniform cell seeding; incorporating features to minimize shear stress; ensuring optical transparency for microscopy; planning for integration with analytical tools; and considering fabrication complexity versus functionality needs [5] [4] [6].
Experimental Protocols and Methodologies
Protocol 1: Mammalian Cell Culture in Single-Layer PDMS Devices
Device Fabrication:
- Create device design using AutoCAD and optimize parameters with COMSOL Multiphysics software for fluid dynamics simulation [6].
- Fabricate using standard soft lithography methods with a two-layer monolithic slab of PDMS reversibly bonded to a glass coverslip [5].
- Incorporate rectangular serpentine micromixers for reagent delivery and biochemical stimulation [6].
Cell Loading and Culture:
- Utilize vacuum-assisted loading to protect cells from shear stress during introduction to chambers [6].
- For suspension cells, use distribution networks that ensure even cell distribution without valves [5].
- Maintain cells with continuous perfusion using software-controlled syringe pumps, dynamically adjusting flow rates as needed for experimental conditions [6].
Stimulation and Analysis:
- Program syringe pumps using customized Matlab code to dynamically change flow rates during mixing and media exchange experiments [6].
- For signaling studies, expose chambers to perturbations using laminar flow patterns for complete fluid turnover [5].
- Fix and stain cells in situ, then image using inverted fluorescence microscopy with appropriate magnification (10× for general imaging, 20× for viability experiments) [6].
Protocol 2: Digital Microfluidics for Cell Culture
Device Configuration:
- Use glass-based DMF chips with arrays of actuation electrodes (chromium and gold layers) coated by a dielectric layer (SU-8, PDMS, parylene C, or silicon nitride) [4].
- Apply hydrophobic coating (Teflon AF, FluoroPel, or Cytop) to reduce contact angle and actuation voltage [4].
- Create hydrophilic windows by locally removing ITO and hydrophobic layers to enable cell adhesion [4].
Cell Culture Operations:
- Culture cells on the top plate by flipping the DMF device in the incubator [4].
- Coat glass surfaces within windows with cell adhesion proteins to facilitate attachment [4].
- Manipulate droplets containing cells, nutrients, and reagents using AC or DC actuation modes [4].
Research Reagent Solutions
Table: Essential Materials for Microfluidic Cell Culture Experiments
| Reagent/Material | Function/Application | Examples/Specifications |
|---|---|---|
| Polydimethylsiloxane (PDMS) | Primary material for device fabrication due to biocompatibility, gas permeability, and optical clarity [5] [6] | Two-layer monolithic slabs reversibly bonded to glass coverslips [5] |
| Extracellular Matrix (ECM) Hydrogels | Provide 3D scaffold for cell growth, mimicking natural tissue environment [1] | Basement membrane extracts with pores for nutrient/gas passage [1] |
| Cell Adhesion Proteins | Coat surfaces to promote cell attachment and spreading [4] | Applied to hydrophilic windows on DMF devices [4] |
| Syringe Pumps | Deliver media and reagents at controlled flow rates [6] | Programmable systems (e.g., AL-1000) with custom Matlab control [6] |
| Fluorescent Dyes | Enable visualization of fluid mixing, cell tracking, and signaling events [6] | Atto 488, Atto 647, Rhodamine B at 10 µM concentration [6] |
| Surface Coatings | Reduce biofouling and modify surface properties [4] | Teflon AF, FluoroPel, Cytop for hydrophobic surfaces [4] |
Signaling Pathways and Experimental Workflows
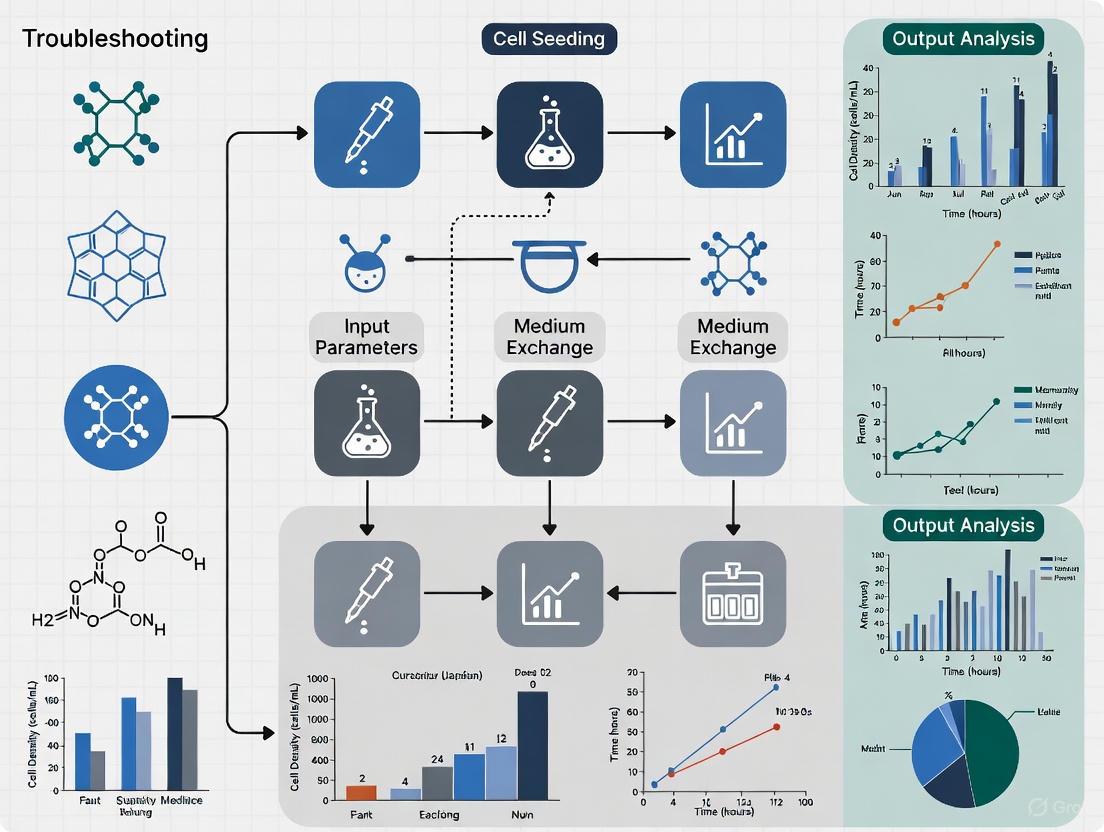
Media Exchange and Mixing Workflow
Media Exchange and Mixing Workflow
Microfluidic Device Selection Decision Tree
Device Selection Decision Tree
Microfluidic technology represents a paradigm shift in mammalian cell culture, addressing critical limitations of both traditional 2D and 3D culture systems. By enabling precise control over the cellular microenvironment, reducing reagent consumption, facilitating automation, and allowing for real-time monitoring of cellular responses, microfluidics provides researchers with powerful tools to study complex biological processes under more physiologically relevant conditions. While challenges remain in standardization, fabrication accessibility, and integration with analytical techniques, the continued advancement of microfluidic platforms promises to accelerate drug discovery, improve disease modeling, and enhance our fundamental understanding of cell biology.
This technical support guide provides a structured comparison of single-layer, multilayer, and Digital Microfluidic (DMF) systems for researchers integrating microfluidics with mammalian cell culture. Each architecture presents unique advantages and troubleshooting challenges that directly impact experimental outcomes in drug development and cellular analysis. The following sections offer detailed FAQs, comparative data, and procedural guides to assist in selecting and optimizing the appropriate system for your specific research applications, with a focus on resolving practical implementation barriers in complex biological experiments.
Comparative Analysis of Microfluidic Architectures
The table below summarizes the core characteristics, advantages, and common challenges associated with the three primary microfluidic architectures used in mammalian cell culture.
Table 1: Key Features and Challenges of Microfluidic Architectures
| Feature | Single-Layer Devices | Multilayer Devices | Digital Microfluidic (DMF) Systems |
|---|---|---|---|
| Basic Principle | Fluid flow through a single plane of channels [6]. | Fluid control via dedicated, stacked layers for flow and control [6]. | Electrode-based manipulation of discrete droplets on a surface [7] [8]. |
| Typical Materials | PDMS [6] | PDMS, glass, multiple adhesive layers | ITO glass, PCB, parylene C dielectric, Cytop/Teflon hydrophobic coating [7] [4] [8] |
| Fabrication Complexity | Low; single soft lithography process [6]. | High; requires alignment and bonding of multiple layers [6]. | Moderate; involves photolithography and deposition of multiple thin films [7] [8]. |
| Fluid Handling | Continuous flow in fixed channels; requires external pumps [6]. | Continuous flow with integrated valve control for switching and mixing [6]. | Programmable, discrete droplet movement (dispense, merge, split) without pumps [7] [9]. |
| Cell Culture Modalities | Adherent or suspension culture in channels or chambers; suitable for long-term perfusion [6]. | High-complexity assays; dynamic stimulation with multiple inputs; long-term culture [6]. | Adherent culture on modified top plate; suspension culture in droplets; automated media exchange [4]. |
| Common Challenges | Limited functional integration (e.g., mixing, valving); potential for high shear stress [6]. | Complex fabrication and operation; risk of delamination [6]. | Biofouling; surface compatibility; evaporation; limited cell capacity per droplet (~500-1000 cells) [4]. |
Troubleshooting Guides and FAQs
FAQ 1: How do I choose between these architectures for a long-term mammalian cell culture experiment?
The choice hinges on the required balance between environmental control, analytical complexity, and throughput.
- For maximum microenvironment control and perfusion: Use a single-layer device. Its simplicity supports long-term culture, as demonstrated by devices maintaining mammalian cell viability for extended periods in chambers with continuous media perfusion [6].
- For complex, dynamic stimulation protocols: A multilayer device is superior. These systems enable automated, temporally varying exposures to multiple drugs or media conditions by integrating valves and multiplexers [6].
- For high-throughput, automated screening with minimal reagents: A DMF system is ideal. DMF automates droplet operations, allowing for parallel processing of many conditions with low reagent consumption and reduced risk of cross-contamination between samples [4] [8].
FAQ 2: My mammalian cells are suffering from low viability in my DMF device. What could be the cause?
Low cell viability in DMF can stem from several factors related to the device's operational physics and surface chemistry.
- Electrical Stress: Although the electric field in DMF largely concentrates in the dielectric layer, magnetic flux density or current leakage may affect sensitive cell types. Verify that your operational voltage and frequency are within bio-compatible ranges [4].
- Surface Biocompatibility: The standard hydrophobic coatings (e.g., Cytop, Teflon AF) are not conducive to cell adhesion. Solution: Create "hydrophilic windows" by locally removing the hydrophobic and ITO layers from the top plate, and then coat these areas with cell-adhesive proteins like fibronectin or collagen to improve attachment and health [4].
- Shear Stress: Droplet actuation can generate shear forces. Solution: Ensure the device gap height is appropriately designed for your droplet volumes to minimize shear during movement [4].
- Evaporation: This is a common issue in DMF, especially for long-term cultures. Solution: Use a closed-plate configuration and maintain a humidified environment inside the device housing or incubator [4].
FAQ 3: I am experiencing biofouling and unwanted cell adhesion in my single-layer PDMS device. How can I prevent this?
Biofouling can clog channels and interfere with experiments.
- Surface Passivation: Prior to introducing cells, flush the channels with a solution of bovine serum albumin (BSA) or Pluronic F-127. These agents form a dynamic coating that minimizes non-specific protein adsorption and subsequent cell adhesion in areas where they are not wanted.
- Region-Specific Modification: If you need cells to adhere only in specific chambers, use techniques like plasma oxidation or surface coating with extracellular matrix (ECM) proteins through a micro-patterning approach to create defined adhesive regions [8].
FAQ 4: The reagents in my DMF droplet are not mixing efficiently. What can I do?
Incomplete mixing is a common hurdle in DMF-based assays.
- Optimize Actuation Parameters: Increase the speed and number of droplet translations between adjacent electrodes. "Moving" the droplet back and forth rapidly is the primary method to induce mixing via internal advection.
- Use a Dedicated Mixing Electrode: Some DMF designs incorporate specialized electrode sequences or shapes specifically to generate chaotic advection within the droplet, significantly enhancing mixing efficiency over standard transport.
- Leverage Advanced Control Systems: Integrate an AI-assisted feedback control system like μDropAI. A semantic segmentation model can visually monitor droplet contents and dynamically adjust the mixing actuation sequence in real-time to ensure homogeneity [7].
The following decision workflow can help in selecting an architecture and addressing common problems:
Detailed Experimental Protocols
Protocol 1: Vacuum-Assisted Mammalian Cell Loading in a Single-Layer Device
This protocol details the process for loading cells into a single-layer PDMS device equipped with vacuum chambers, minimizing shear stress and ensuring high cell viability [6].
Research Reagent Solutions: Table 2: Essential Materials for Vacuum-Assisted Cell Loading
| Item | Function | Example/Note |
|---|---|---|
| PDMS Device | Microfluidic platform with vacuum channels. | Fabricated via soft lithography [6]. |
| Vacuum Pump | Creates negative pressure to pull cells into traps. | Connected to device's vacuum inlet. |
| Mammalian Cell Suspension | Experimental subject. | Prepared at appropriate concentration. |
| Cell Culture Media | Maintains cell viability during and after loading. | Serum-containing or defined media. |
| Tubing & Connectors | Interfaces pump to device. | Chemically inert (e.g., silicone). |
Methodology:
- Device Preparation: Sterilize the PDMS device using an autoclave or UV light. Flute the device with sterile phosphate-buffered saline (PBS) to wet the channels and remove any air bubbles.
- System Setup: Connect the vacuum port of the device to a programmable vacuum pump via sterile tubing.
- Cell Preparation: Trypsinize and resuspend your mammalian cells in culture media at a defined concentration (e.g., 1-5 million cells/mL).
- Loading: Introduce the cell suspension into the main inlet of the device. Activate the vacuum pump briefly (e.g., 1-5 seconds). The negative pressure in the parallel vacuum channels will pull individual cells from the main flow into the adjacent trapping chambers, protecting them from high shear forces.
- Culture: Once the chambers are populated, turn off the vacuum and switch the inlet to a continuous flow of fresh culture media for long-term perfusion.
Protocol 2: Automating Magnetic Bead Washing for Immunoassay on DMF
This protocol describes a DMF method for efficiently processing magnetic beads with minimal loss, a critical step for sensitive protein detection assays like Simoa [10].
Methodology:
- Bead and Sample Preparation: Mix the sample (e.g., serum, lysate) with antibody-functionalized magnetic beads off-chip or in a dedicated reservoir on the DMF device.
- Incubation: Actuate the droplet containing the bead-sample mixture to a designated incubation zone on the DMF electrode array. Use a shaking mixing protocol to keep beads suspended during incubation.
- Bead Capture: After incubation, transport the droplet to a "washing" zone. Apply a permanent magnet beneath the target electrode to immobilize the beads against the bottom plate.
- Supernatant Removal: Actuate the electrode adjacent to the immobilized beads to pull the supernatant waste droplet away, leaving the beads behind.
- Washing: Dispense a clean buffer droplet from a reservoir and merge it with the captured beads. Deactivate the magnet momentarily to resuspend the beads, then reactivate it to re-capture them. Repeat this supernatant removal and resuspension cycle as needed.
- Elution: After the final wash, a small elution buffer droplet is merged with the beads and moved to a detection zone or to the next step in the assay workflow. The "densifying electrode" technique can be used to maximize bead retention during these steps [10].
The workflow for this automated bead-based assay is visualized below:
FAQ: Core Properties and Selection
Q1: What are the fundamental properties of PDMS that make it suitable for mammalian cell culture and microfluidic applications?
PDMS is widely used due to a combination of advantageous properties. Its excellent optical transparency (75–92% transmittance in 390-780 nm wavelength range) and low autofluorescence facilitate microscopic observation and analysis [11]. It is highly gas-permeable, enabling essential oxygen and carbon dioxide exchange for cell culture, and is a thermal and electrical insulator [11] [12]. PDMS is an elastomer with a low Young's modulus (360–870 kPa), which is hyperelastic and can mimic the mechanical properties of some biological tissues [11]. Finally, it is generally considered biocompatible and physiologically indifferent, supporting its use in biomedical devices [11] [13].
Q2: Under what circumstances should I consider an alternative material to PDMS for my cell culture studies?
You should consider alternative materials like Cyclic Olefin Copolymer (COC) when your experiment involves small, lipophilic molecules [14] [15]. PDMS readily absorbs such compounds, distorting drug concentrations and pharmacokinetic data [14] [16]. Furthermore, if your protocol requires precise control of hypoxia or involves organic solvents like chloroform or acetone, PDMS is unsuitable due to its gas permeability and tendency to swell [14] [17]. For long-term cell culture, PDMS's inherent hydrophobicity can be a limitation, and while surface treatments can mitigate this, they are often temporary [11] [18].
Q3: What are the best practices for surface treatment to make PDMS hydrophilic, and how long does the effect last?
The most common method is surface activation via oxygen plasma treatment, which oxidizes the surface, creating silanol (Si-OH) groups and making it hydrophilic [11] [17]. A major limitation is that this hydrophilic state is not permanent; the surface typically recovers its hydrophobicity within minutes to hours when stored in air due to the reorientation of polymer chains and migration of uncured oligomers [11]. For longer-lasting hydrophilicity, investigate physisorption techniques (e.g., layer-by-layer deposition) or chemical grafting of hydrophilic polymers (e.g., polyethylene glycol) or zwitterionic compounds after plasma activation [11] [18].
FAQ: Troubleshooting Experimental Issues
Q4: My drug response data is inconsistent, and I suspect the drug is being absorbed by the PDMS chip. How can I confirm this and what can I do?
Your suspicion is valid, as this is a well-documented issue. To confirm, you can:
- Measure Concentration Loss: Use High-Performance Liquid Chromatography-Mass Spectrometry (HPLC-MS) to analyze the concentration of your compound before and after incubation in a PDMS device, comparing it to a reference sample in glass or COC [14].
- Check Compound Properties: The absorption is strongest for molecules with high lipophilicity (logP > 2) and a high rotatable bond count [14].
Solutions include:
- Switch Materials: Use COC or glass for studies with lipophilic drugs, as these materials show significantly lower sorption [14] [15].
- Pre-saturate PDMS: Pre-incubate the PDMS device with a concentrated solution of the drug to saturate absorption sites before introducing the experimental solution [12].
- Use Surface Coatings: Apply coatings that create a barrier against absorption, though their stability must be verified [18].
Q5: I am observing poor cell adhesion and viability in my PDMS device. What are the potential causes and solutions?
Potential causes and remedies are:
- Hydrophobic Surface: Native PDMS is hydrophobic, which can impede the adhesion of many mammalian cells. Solution: Use oxygen plasma treatment to create a temporarily hydrophilic surface that improves cell attachment [11] [17].
- Cytotoxic Leachates: Uncrosslinked oligomers from the PDMS can leach into the culture medium. Solution: Ensure proper curing and consider post-curing baking. Extensively wash the device before use, and/or extract uncured molecules using organic solvents [19] [17].
- Incompatible Lubricants: In devices like SlipChips, high-viscosity silicone oil lubricants can cause cytotoxicity. Solution: Use low-viscosity silicone oil (e.g., 50 cSt), which has been shown to support high cell viability (>95%) [19].
- Protein Adsorption: PDMS readily adsorbs proteins, which can deplete essential nutrients or growth factors from the medium. Solution: Pre-coat the surface with extracellular matrix proteins (e.g., collagen, fibronectin) to create a more biocompatible layer [18].
Quantitative Data for Material Selection
Table 1: Key Physical and Optical Properties of PDMS
| Property | Typical Value/Range | Relevance to Cell Culture & Microfluidics | Source |
|---|---|---|---|
| Optical Transmittance | 75% - 92% (390-780 nm) | Enables clear microscopic imaging and optical detection. | [11] |
| Young's Modulus | 360 - 870 kPa | Flexible, can mimic soft tissues; allows for integrated valves. | [11] |
| Hydrophobicity (Contact Angle) | ~108° ± 7° | Hinders aqueous flow and cell adhesion; requires surface treatment. | [11] |
| Gas Permeability | High to O₂ and CO₂ | Supports cell respiration in culture without active perfusion. | [11] [12] |
| Dielectric Constant | 2.3 - 2.8 | Good electrical insulation property. | [11] |
| Autofluorescence | Low | Reduces background noise in fluorescence-based assays. | [12] |
Table 2: Small Molecule Sorption in PDMS vs. COC after 24 Hours (Static Conditions)
| Compound | LogP (Lipophilicity) | Recovery in PDMS (%) | Recovery in COC (%) | Implication |
|---|---|---|---|---|
| Caffeine | -0.07 | ~100% (No significant sorption) | ~100% | Low-risk compound for both materials. |
| Melatonin | 1.60 | Significantly Lower | Higher | PDMS heavily absorbs even moderately lipophilic molecules. |
| Amlodipine | 3.00 | 2.8% | 18.1% | High sorption in both, but severe in PDMS. COC is preferred. |
| Imipramine | 4.80 | 0.038% | 31.5% | Extreme sorption in PDMS; data from PDMS devices is unreliable. |
| Loperamide | 5.13 | Near-total sorption | Partial recovery | PDMS is unsuitable for quantitative studies of such compounds. |
Data adapted from Scientific Reports (2025) [14]
Experimental Protocols
Protocol 1: Standard Fabrication of PDMS Microfluidic Devices via Soft Lithography
This protocol describes how to create a PDMS microfluidic device from a master mold.
Research Reagent Solutions:
- PDMS Elastomer Kit: Sylgard 184 is commonly used. Contains PDMS base and cross-linking agent.
- Silicon Wafer: Serves as a substrate for the mold.
- SU-8 Photoresist: A negative photoresist for creating high-resolution master molds via photolithography.
- Plasma Cleaner: For activating PDMS and glass surfaces for irreversible bonding.
Workflow:
- Master Mold Fabrication: Create a master mold by patterning SU-8 photoresist on a silicon wafer using standard photolithography techniques [19].
- PDMS Mixing & Degassing: Mix the PDMS base and curing agent at a recommended ratio (typically 10:1 w/w). Stir thoroughly and place in a vacuum desiccator to remove air bubbles until the mixture is clear [19] [17].
- PDMS Curing: Pour the degassed PDMS mixture over the master mold. Cure in an oven at a defined temperature and time (e.g., 80°C for 1 hour). Note: Curing temperature can be adjusted to tune mechanical properties [19].
- Device Demolding & Cutting: After curing, carefully peel the solidified PDMS slab off the mold. Use a scalpel to cut out individual devices.
- Inlet/Outlet Creation: Use a biopsy punch to create fluidic inlets and outlets in the PDMS slab.
- Bonding: Clean a glass slide and the patterned side of the PDMS slab. Treat both surfaces with oxygen plasma to activate them. Bring the activated surfaces into immediate contact to form an irreversible seal [17].
Protocol 2: Assessing the Cytocompatibility of a PDMS Device
This protocol ensures that your fabricated PDMS device supports cell growth and does not release cytotoxic substances.
Research Reagent Solutions:
- Mammalian Cell Line: e.g., Human osteosarcoma cells or other relevant cell types.
- Cell Culture Medium: Appropriate medium with serum and supplements.
- Viability Stain: Trypan Blue for manual counting or reagents for MTT/WST assays.
- Control Substrate: Traditional tissue culture plastic (e.g., multiwell plate).
Workflow:
- Device Sterilization: Sterilize the bonded PDMS device using an appropriate method (e.g., autoclaving, UV irradiation, or 70% ethanol flushing followed by PBS rinsing). Avoid hydrogen peroxide-based sterilization, as it can be absorbed and increase cytotoxicity [13].
- Surface Preparation (Optional): If required for your cell type, pre-coat the microchannels with an extracellular matrix protein like collagen or fibronectin.
- Cell Seeding: Prepare a single-cell suspension and seed cells into the microfluidic channels of the PDMS device at the desired density. In parallel, seed cells in a standard multiwell plate as a control.
- Culture Maintenance: Culture the cells under standard conditions (37°C, 5% CO₂). For PDMS devices, the high gas permeability often eliminates the need for active perfusion in short-term experiments.
- Viability Assessment: After an appropriate period (e.g., 24-72 hours), assess cell viability. This can be done by:
- Live/Dead Staining: Using fluorescent dyes (e.g., Calcein-AM for live cells, propidium iodide for dead cells) and imaging.
- Metabolic Assays: Performing an MTT or WST assay, adapting the protocol for the microfluidic format.
- Direct Observation: Monitoring cell morphology and confluence under a microscope compared to the control [19] [15].
The Scientist's Toolkit
Table 3: Essential Materials and Reagents for PDMS-based Research
| Item | Function/Application | Notes |
|---|---|---|
| Sylgard 184 Kit | Standard two-part PDMS for device fabrication. | 10:1 base-to-curing agent ratio is common; adjust for stiffness. |
| Cyclic Olefin Copolymer (COC) | Alternative thermoplastic for lipophilic compound studies. | Low sorption, high optical clarity, but requires hot embossing for fabrication. |
| Oxygen Plasma System | Activates PDMS surface for bonding and hydrophilicity. | Creates a temporary hydrophilic surface. |
| Low-Viscosity Silicone Oil (50 cSt) | Lubricant for movable parts (e.g., SlipChips). | Minimizes channel blockage and shows good biocompatibility. |
| Zwitterionic Compounds (e.g., CB) | Surface modification to reduce protein fouling. | Creates a stable, non-fouling surface; more robust than PEG [18]. |
| Extracellular Matrix Proteins | Coating to improve cell adhesion and viability. | e.g., Collagen, fibronectin, laminin. |
Culturing mammalian cells in microfluidic devices presents a unique set of challenges and opportunities. Unlike traditional macroscopic culture, microfluidic cultivation (MC) allows for the precise control of the cellular microenvironment with high spatio-temporal resolution, enabling the cultivation of small cell clusters or even single cells under defined conditions [20]. However, this miniaturization also means that parameters like pH, CO₂, metabolite concentration, and shear stress require meticulous monitoring and control, as small volumes can lead to rapid and significant fluctuations that compromise cell health and experimental reproducibility [20] [21]. Success in microfluidic-mammalian cell culture integration is therefore defined by the ability to establish and maintain a stable, physiologically relevant microenvironment. This technical support center provides a targeted troubleshooting guide to help researchers identify, diagnose, and resolve the most common issues related to these critical parameters.
The table below summarizes the key parameters that define a healthy microenvironment for mammalian cells in microfluidic systems. Consistent monitoring of these parameters is essential for experimental success.
Table 1: Key Parameters for a Healthy Microenvironment
| Parameter | Target Range | Importance | Measurement Tools |
|---|---|---|---|
| pH | 7.2 - 7.4 (for most mammalian cells) | Critical for enzyme activity, cell growth, and metabolic function [22]. | In-line pH sensors, phenol red in medium (colorimetric), off-line blood gas analyzer. |
| CO₂ | 5% - 10% | Maintains bicarbonate buffer system to stabilize pH [23]. | Incubator sensor, in-line gas sensors. |
| Metabolites | Varies (e.g., maintain glucose >1 g/L, prevent lactate accumulation) | Indicates metabolic activity and health; imbalances cause stress and phenotype loss [22]. | Off-line analyzers (e.g., HPLC, GC-MS), in-line sensors, commercial test kits. |
| Shear Stress | Cell-type specific (e.g., ~0.33 dyn/cm² for hepatocytes [24]; higher for endothelial cells) | Controls cell morphology, differentiation, and function; excessive stress causes detachment or death [24] [21]. | Computational Fluid Dynamics (CFD) simulation, experimental validation with tracer particles. |
| Oxygen | Varies (e.g., 1%-10% O₂ for physiologically relevant or hypoxic conditions [23]) | Regulates cell function via hypoxia-inducible factors; atmospheric (~21%) O₂ can be supraphysiological [23]. | In-line optical or electrochemical sensors, off-line blood gas analyzer. |
Troubleshooting Guide: FAQs and Solutions
pH and CO₂ Instability
Q1: The pH in my microfluidic device is unstable, drifting significantly during experiments. What could be the cause and how can I fix it?
- Cause Analysis: pH instability in microfluidic systems is often due to an inadequate buffering capacity of the culture medium. In small-volume cultures, cellular metabolic activity can rapidly alter the local concentration of H⁺ ions. The standard bicarbonate/CO₂ buffering system may be insufficient if gas exchange is not optimal [22] [21].
- Solution:
- Verify CO₂ Delivery: Ensure your device is housed in a gasketed chamber that maintains a stable 5-10% CO₂ environment. Check for leaks in the gas lines and chamber seals [20].
- Enhance Buffering Capacity: Supplement your culture medium with additional buffering agents, such as 10-25 mM HEPES, to provide better pH stability outside a strictly controlled CO₂ environment [22].
- Optimize Perfusion Rate: Implement a continuous perfusion system. A well-tuned flow rate ensures a continuous supply of fresh buffered medium and prevents the accumulation of acidic metabolic waste products like lactic acid [20] [24]. Use a flow sensor with a feedback loop for precise control [25].
- Switch to Physiological Media: Consider using advanced, human plasma-like media (e.g., Plasmax, HPLM). These formulations are designed with human metabolic profiles in mind and can demonstrate improved metabolic stability [22].
Q2: My cells are exhibiting poor growth or death, and I suspect CO₂ levels are incorrect. How can I troubleshoot this?
- Cause Analysis: Incorrect CO₂ levels directly impact pH, which in turn affects virtually all cellular processes. This can be caused by an uncalibrated incubator sensor, insufficient gas exchange due to device material, or an imbalanced perfusion system [21] [23].
- Solution:
- Calibrate and Verify: Regularly calibrate your incubator's CO₂ sensor using an independent reference method. Place a secondary, certified CO₂ meter inside the incubator to validate the reading.
- Check Material Gas Permeability: If using PDMS, ensure it is properly cured and not overly thick, as its high gas permeability is usually an advantage. If using other thermoplastics, confirm they allow for sufficient CO₂ exchange or design your system to include a gas-permeable membrane [26] [21].
- Monitor Medium Color: For media containing phenol red, a color change from red (pH ~7.4) to orange/yellow indicates acidosis (too much CO₂ or metabolic acid), while a purple color indicates alkalosis (insufficient CO₂).
Metabolite Imbalance
Q3: How can I prevent the depletion of nutrients and the build-up of waste metabolites in my microfluidic cell culture?
- Cause Analysis: In static microfluidic cultures, the small volume of medium leads to rapid nutrient consumption (e.g., glucose, glutamine) and accumulation of waste products (e.g., lactate, ammonia), creating a toxic microenvironment [24] [22].
- Solution:
- Implement Continuous Perfusion: This is the most effective strategy. A continuous flow of fresh medium provides constant nutrients and removes wastes, mimicking the in vivo vascular system [20] [24].
- Determine Optimal Flow Rate: The perfusion rate must be carefully calibrated. Too slow a rate will not prevent metabolite gradients; too fast a rate can subject cells to excessive shear stress and waste reagents. Use CFD simulations or experimental data to find a balance that maintains key metabolites (e.g., glucose) within a target range [20].
- Monitor Metabolites: Periodically sample effluent medium or use in-line sensors to track glucose and lactate levels. This data will help you refine your perfusion protocol and serves as a key indicator of cellular metabolic health [22].
Q4: My primary cells are losing their phenotype in the microfluidic device. Could the culture medium be the issue?
- Cause Analysis: Many traditional media formulations (e.g., DMEM) were designed for rodent cells or cancer cell lines and do not meet the unique metabolic requirements of specific human primary cells or stem cells. The use of fetal bovine serum (FBS) introduces batch-to-batch variability and undefined components that hinder reproducibility and can drive unintended differentiation [22] [23].
- Solution:
- Transition to Defined Media: Replace FBS with serum-free, xeno-free, and chemically defined media (CDM) specifically formulated for your cell type (e.g., for T-cells, stem cells) [22] [23]. This eliminates variability and provides greater control over the microenvironment.
- Use Human-Based Supplements: If a complete transition is not possible, consider replacing FBS with human platelet lysate (HPL) for expanding mesenchymal stem cells, though be aware of potential donor-dependent variability [22].
- Confirm Media Physiologically: Review the composition of your medium. For human cells, consider switching to physiological media that more closely mimics the nutrient and ion composition of human plasma to support authentic cell behavior [22].
Shear Stress Management
Q5: My cells are detaching from the substrate when I start perfusion. How can I manage shear stress?
- Cause Analysis: Cells in microchannels are sensitive to fluid shear stress. The onset of perfusion, especially at high flow rates, can expose cells to forces they do not experience in static culture, leading to detachment [24] [21].
- Solution:
- Calculate and Reduce Shear Stress: Use CFD simulations during the device design phase to model and minimize shear stress in the cell cultivation chambers [20]. The shear stress (τ) in a rectangular microchannel is estimated by τ = (6μQ)/(w·h²), where μ is viscosity, Q is flow rate, w is width, and h is height. Reducing flow rate (Q) or increasing chamber height (h) can dramatically lower shear.
- Gradually Ramp Flow: Do not start with the full target flow rate. Begin perfusion at a very low rate and gradually increase it over several hours to allow cells to adapt.
- Improve Cell Adhesion: Ensure the substrate is properly coated with extracellular matrix (ECM) proteins like collagen, fibronectin, or laminin to enhance cell attachment [24] [21].
- Incorporate Microstructures: Design your device with microstructures (e.g., micropillars, grooves) upstream or around the culture chamber to disrupt flow and create low-shear zones for the cells [24].
Q6: How do I provide a physiologically relevant 3D environment while ensuring sufficient nutrient supply and low shear stress?
- Cause Analysis: While 3D cultures (e.g., in hydrogels) better mimic in vivo tissue architecture, they can create significant diffusion barriers, leading to core regions with nutrient deprivation and waste buildup if not perfused properly. However, direct perfusion through a dense 3D construct can generate high, damaging shear [24].
- Solution:
- Utilize Vascularized Channel Designs: Fabricate devices with two or more overlapping channel layers separated by a porous membrane. One channel set can act as a "blood vessel" for medium perfusion, while the adjacent chamber houses the 3D culture, allowing for diffusive mass exchange that protects cells from direct shear [24].
- Optimize Matrix Porosity: Select a 3D scaffold or hydrogel with a pore size and density that allows for adequate diffusion and, if possible, interstitial flow without generating high resistance.
- Employ a Radial-Flow Bioreactor Design: As demonstrated in bioartificial liver devices, a radial-flow design can ensure uniform nutrient supply while maintaining shear stress below a critical threshold (e.g., <0.33 dyn/cm² for hepatocytes) [24].
The Scientist's Toolkit: Essential Research Reagents and Materials
Table 2: Key Reagents and Materials for Microfluidic Mammalian Cell Culture
| Item | Function & Importance |
|---|---|
| Chemically Defined Media (CDM) | Serum-free, xeno-free media eliminates batch variability, supports clinical translation, and allows precise control over cellular inputs [22] [23]. |
| Physiological Media (e.g., HPLM, Plasmax) | Formulations that mimic human plasma nutrient/ion concentrations, enabling metabolically faithful cell behavior [22]. |
| Extracellular Matrix (ECM) Proteins (Collagen, Fibronectin, Laminin) | Coating substrates to promote cell adhesion, spreading, and survival by mimicking the native cellular environment [24]. |
| PDMS or Alternative Polymers (e.g., Flexdym) | PDMS is biocompatible, transparent for imaging, and gas-permeable. Alternatives like Flexdym offer lower absorption and industrial scalability [20] [26]. |
| Flow Sensors & Pressure Controllers | Provide real-time monitoring and closed-loop feedback control of perfusion, ensuring stable flow rates and minimizing shear stress fluctuations [25]. |
| In-line/Optical Sensors (pH, O₂) | Enable non-invasive, real-time monitoring of key microenvironmental parameters without the need for sampling [20]. |
Experimental Workflow for System Characterization
Before beginning live-cell experiments, it is crucial to characterize your microfluidic system to ensure the microenvironment is stable and suitable for your cells. The following workflow provides a methodology for this process.
Title: Microfluidic Cell Culture Setup and Characterization Workflow
Detailed Protocol:
Computational Fluid Dynamics (CFD) Simulation:
- Objective: To predict shear stress and mass transport within the device before fabrication.
- Methodology: Use CFD software (e.g., COMSOL Multiphysics, ANSYS Fluent) to model the flow fields and shear stress distribution in your designed channel and chamber network. This helps identify and eliminate areas of stagnation or excessively high shear prior to costly fabrication [20].
Experimental Flow and Mixing Characterization:
- Objective: To empirically verify flow behavior and chamber turnover.
- Methodology: Prime the assembled device with a buffer solution. Introduce a bolus of a fluorescent dye or tracer particles and use time-lapse microscopy to visualize the flow path, measure the velocity profile, and confirm that cultivation chambers are being efficiently exchanged without dead zones [20].
Metabolite Monitoring Protocol:
- Objective: To quantify nutrient consumption and waste production for perfusion rate optimization.
- Methodology:
- Collect effluent medium from the device outlet at regular intervals (e.g., every 6-12 hours initially).
- Use a blood gas analyzer for pH and bicarbonate measurement.
- Use commercial assay kits or high-performance liquid chromatography (HPLC) to measure concentrations of key metabolites like glucose and lactate [22].
- Plot the metabolite concentrations over time. The goal is to establish a perfusion rate where glucose remains stable above a critical level (e.g., 1 g/L) and lactate does not accumulate linearly.
Cell Morphology and Viability Assessment:
- Objective: To serve as a direct, visual indicator of cell health in response to the microenvironment.
- Methodology: Use live-cell imaging capabilities of your microscope setup. Look for standard morphological features of healthy cells (e.g., adherent, spread morphology for fibroblasts; cobblestone morphology for endothelial cells). Signs of stress include cell rounding, membrane blebbing, and detachment. Supplement with live/dead staining (e.g., calcein-AM/propidium iodide) at the end of an experiment for quantitative viability assessment [20] [21].
Implementing Robust Methodologies for Dynamic and Long-Term Culture
The integration of mammalian cell culture with microfluidic systems presents a significant challenge: managing the fluid-induced mechanical forces that can compromise cell viability and function. Shear stress, the tangential force exerted by fluid moving parallel to a cell surface, is a critical parameter in microfluidic design. In microfluidic channels, the small geometrical dimensions can lead to substantial shear stress on cultured cells, which is often detrimental. Excessive shear can damage cell membranes, alter cell morphology, trigger unintended signaling pathways, and reduce cell viability [24] [12].
Advanced cell loading techniques have been developed to minimize these detrimental effects. Vacuum-assisted systems and gravity-driven systems represent two promising approaches that significantly reduce shear stress during the critical cell loading phase and throughout cultivation. These methods offer more physiologically relevant environments for cells, leading to more reliable and reproducible experimental outcomes in drug development and basic biological research [4] [27].
Technical FAQs: Shear Stress Fundamentals
Q1: What is the typical range of harmful shear stress for mammalian cells in microfluidic systems?
The sensitivity to shear stress varies by cell type, but general thresholds have been established through experimentation. The table below summarizes critical shear stress values for different biological contexts:
Table 1: Shear Stress Thresholds in Microfluidic Systems
| Cell Type/Context | Critical Shear Stress Threshold | Biological Effect | Reference Source |
|---|---|---|---|
| General Hepatocyte Viability | > 0.33 dyn/cm² | Significant decrease in cell viability observed | [24] |
| Hepatocytes in Bioreactor | ~0.5 to 5 dyn/cm² | Viability dropped from 98% to 0% in unprotected areas | [24] |
| Endothelial Cells (Atherogenic) | Disturbed/Turbulent Flow | Promotes inflammation and atherosclerosis | [28] |
| Microfluidic T-Cell Capture | 1.00 - 3.98 dyn/cm² | Optimized range for efficient cell capture without damage | [29] |
Q2: How do vacuum-assisted and gravity-driven systems technically reduce shear stress compared to active pumping?
Traditional active pumping methods, such as syringe or peristaltic pumps, often generate pulsatile flow and require high initial pressures to initiate movement, resulting in unpredictable shear stress profiles. In contrast:
- Vacuum-Assisted Systems: These generate flow by applying a controlled negative pressure (vacuum) at the outlet of the microfluidic device. This creates a gentle, pulling force that draws fluid and cells through the channels. Since the pressure differential can be finely controlled and lacks the pulsing of mechanical pumps, it produces a more uniform, lower-shear environment [29].
- Gravity-Driven Systems: These rely on hydrostatic pressure generated by a height difference between the fluid inlet and outlet reservoirs. The flow is driven by the weight of the fluid itself, resulting in a consistently low, steady flow rate. This passive method eliminates pulsatility and mechanical agitation from pump components, making it exceptionally gentle for cell loading and long-term culture [27].
Troubleshooting Guides
Troubleshooting Vacuum-Assisted Cell Loading
Vacuum-assisted assembly and cell loading is a technique where negative pressure is used to assemble device components and/or to draw cell suspensions into culture chambers.
Table 2: Vacuum-Assisted Systems Troubleshooting
| Problem | Potential Cause | Solution | Preventive Measures |
|---|---|---|---|
| Low Cell Seeding Efficiency | 1. Excessive vacuum pressure.2. Incorrect channel height.3. Non-specific binding to PDMS. | 1. Calibrate vacuum source for minimal required pressure.2. Design channels with heights >25µm for T-cells (scale for other cells).3. Coat PDMS with BSA or use PEG coatings. | - Validate flow rates and pressures using tracer beads before cell experiments.- Use vacuum-compatible surface chemistry (e.g., biotin-PEG on glass) [29]. |
| Air Bubble Formation | 1. Leaks in vacuum lines.2. Sudden pressure changes. | 1. Check all seals and connections; use vacuum grease if needed.2. Incorporate bubble traps into the system design. | - Prime all channels with buffer before applying vacuum to cells.- Ensure stable temperature to outgas dissolved air prior to loading. |
| Cell Viability Post-Loading | 1. Lysis from shear during loading.2. Extended exposure to vacuum pressure. | 1. Reduce vacuum pressure to the minimum required for movement.2. Minimize the time cells are under vacuum control. | - Use a "pulse perfusion" method: apply vacuum intermittently only to load cells, then switch to passive perfusion for culture [30]. |
Experimental Protocol: Vacuum-Assisted Device Assembly and Cell Loading This protocol is adapted from methods used for microfluidic cell capture devices [29].
- Device Preparation: Fabricate a PDMS microfluidic channel containing flow channels and a separate "vacuum line" that surrounds the flow channels. Prepare a glass substrate coated with a cell-compatible coating (e.g., a mixture of PEG and biotin-PEG).
- Vacuum Assembly: Place the PDMS channel on the glass substrate. Apply a negative pressure to the vacuum line. This creates a seal between PDMS and glass without the need for plasma bonding, which can damage sensitive biological coatings.
- System Priming: Introduce cell culture medium through the inlet to prime the flow channels, ensuring no air bubbles are trapped.
- Cell Loading:
- Prepare a single-cell suspension in culture medium.
- Place the cell suspension at the inlet reservoir.
- Apply a controlled, low negative pressure to the outlet reservoir via a vacuum pump or other controlled source. The pressure differential will gently draw the cell suspension into the culture chamber.
- Monitor cell loading under a microscope. Once the chamber is populated, stop the vacuum.
- Post-Loading Culture: Switch to a gentle perfusion system (e.g., gravity-driven flow) for long-term culture to minimize continuous shear stress.
Troubleshooting Gravity-Driven Cell Loading
Gravity-driven flow utilizes hydrostatic pressure from height differences between inlet and outlet fluid reservoirs to propel fluids, offering a inherently low-shear, passive pumping mechanism [27].
Table 3: Gravity-Driven Systems Troubleshooting
| Problem | Potential Cause | Solution | Preventive Measures |
|---|---|---|---|
| Unstable or No Flow | 1. Insufficient height difference.2. Channel blockage.3. Evaporation from outlets. | 1. Increase the height of the inlet reservoir relative to the outlet.2. Flush channels with buffer; use cell filters in line.3. Use liquid traps or humidity chambers. | - Calculate expected flow rates using fluid dynamics models (e.g., COMSOL).- Use tubing with low gas permeability for connections. |
| Gradual Flow Rate Change | 1. Dropping fluid level in inlet reservoir.2. Evaporation altering fluid viscosity and reservoir levels. | 1. Use large volume inlet reservoirs or a Mariotte bottle for constant pressure.2. Place entire device in a humidified incubator. | - Use automated fluid level sensors for long-term experiments.- Employ reservoir caps designed to minimize evaporation. |
| Slow Cell Sedimentation | 1. Flow rate too high, preventing cell attachment.2. Surface not conducive to cell adhesion. | 1. Reduce the height difference to lower the flow rate, allowing cells to settle.2. Pre-coat channels with extracellular matrix proteins (e.g., collagen, fibronectin). | - Allow a "static period" (no flow) after loading for initial cell adhesion before initiating slow perfusion. |
Experimental Protocol: Establishing a Gravity-Driven Perfusion System This protocol is based on principles of passive pumping and shear-free microfluidic perfusion [27] [30].
- System Setup: Place the microfluidic device on the microscope stage. Connect the device's inlet to a medium reservoir via tubing. Position this reservoir on a lift at a calculated height (H) above the device's outlet.
- Flow Rate Calculation: The flow rate (Q) is proportional to the height difference (Δh) and the hydraulic resistance (R) of the channel:
Q = Δh * ρ * g / R, whereρis fluid density andgis gravity. Use computational modeling or empirical calibration to determine the required height for the desired flow rate. - Priming and Sterilization: Flush the entire system with sterile culture medium, ensuring no bubbles remain. UV sterilize the device if possible.
- Cell Loading:
- Introduce a concentrated cell suspension into the inlet tubing or directly into the device's culture chamber with the flow temporarily stopped.
- Let the device sit undisturbed for 15-30 minutes in an incubator to allow cells to sediment and adhere to the substrate.
- Gently initiate gravity-driven flow by opening the outlet and maintaining the inlet reservoir at the pre-calculated height.
- Long-Term Cultivation: Maintain the system in a humidified, temperature-controlled incubator. Monitor fluid levels daily and refresh medium in the inlet reservoir as needed.
Gravity-Driven Cell Culture Workflow
The Scientist's Toolkit: Essential Research Reagents and Materials
Successful implementation of low-shear cell loading techniques depends on the appropriate selection of materials and reagents.
Table 4: Essential Materials for Low-Shear Cell Culture
| Item | Function/Application | Technical Notes |
|---|---|---|
| PDMS (Polydimethylsiloxane) | Primary material for rapid prototyping of microfluidic devices due to its gas permeability, transparency, and biocompatibility. | Can absorb small hydrophobic molecules; consider surface coating or alternative materials like polystyrene for sensitive assays [12] [27]. |
| PEG & Biotin-PEG Coating | Creates a non-fouling surface that minimizes non-specific cell binding. Biotin-PEG enables easy immobilization of neutravidin and biotinylated capture antibodies. | A typical mixing ratio of 100:10 (PEG:Biotin-PEG) provides a good balance between passivation and functionalization [29]. |
| Extracellular Matrix (ECM) Proteins | Coats the substrate to promote cell adhesion, spreading, and survival. Mimics the natural cellular environment. | Common options include collagen, fibronectin, and laminin. The choice depends on the specific cell type being cultured [24]. |
| BSA (Bovine Serum Albumin) | Used as a blocking agent to passivate PDMS and other surfaces, reducing non-specific protein adsorption and cell attachment where undesired. | A simple BSA coating step can significantly improve the specificity of affinity-based cell capture in microchannels [29]. |
| Neutravidin | Acts as a bridge between biotinylated surfaces (e.g., biotin-PEG) and biotinylated antibodies (e.g., anti-CD8 for T-cell capture). | Provides a strong and specific non-covalent linkage for functionalizing surfaces with targeting molecules [29]. |
Surface Functionalization for Cell Capture
Mastering advanced cell loading techniques is fundamental to robust and physiologically relevant microfluidic-mammalian cell culture integration. Vacuum-assisted and gravity-driven systems provide researchers with powerful tools to circumvent the damaging effects of shear stress. By understanding the underlying principles, as outlined in the FAQs, and systematically applying the troubleshooting guides and standardized protocols provided, scientists and drug development professionals can significantly enhance the reliability and translational value of their microfluidic-based research.
This technical support center provides targeted troubleshooting guides and FAQs for researchers integrating perfusion systems with microfluidic-mammalian cell cultures. Maintaining precise media exchange and long-term culture stability is crucial for advanced applications like organ-on-chip models, drug screening, and 3D spheroid cultures. The guidance below addresses common operational challenges to ensure reproducible and reliable experimental outcomes.
Frequently Asked Questions (FAQs) and Troubleshooting Guides
Q1: How do I determine the optimal perfusion rate for my specific cell culture to balance nutrient delivery and shear stress?
A: The optimal perfusion rate is cell line-dependent and must balance nutrient/waste exchange with minimal shear stress.
- Step 1: Quantify Metabolic Demand: Start by measuring the glucose and glutamine consumption rates of your culture, alongside waste product (e.g., lactate, ammonia) accumulation. This establishes a baseline metabolic profile [31].
- Step 2: Initiate with Standard Ranges: Begin perfusion within a standard range of 1 to 3 reactor volumes per day (RV/day). For many mammalian cell types, initiating perfusion early (e.g., 48 hours post-inoculation) at a rate of 1.0 VVD (Vessel Volumes per Day) has been shown to support a 4.5-fold increase in final cell yields [32].
- Step 3: Monitor and Adapt: Continuously monitor key parameters. A rising lactate level or a rapid drop in glucose indicates the need for a higher perfusion rate. Conversely, if cell viability drops without nutrient depletion, consider that the rate may be too high, causing damaging shear forces or diluting critical autocrine factors [31] [33].
- Advanced Strategy: For complex cultures like CAR-T cells, use an adaptive perfusion strategy where the rate responds to shifts in viable cell density and metabolic data, rather than following a fixed schedule [32].
Troubleshooting: If viability is low despite adequate nutrients, investigate shear stress from high crossflow velocity or membrane fouling [31].
Q2: What are the primary differences between ATF and TFF systems for media exchange, and how do I choose?
A: The choice between Alternating Tangential Flow (ATF) and Tangential Flow Filtration (TFF) hinges on your cells' sensitivity to shear stress and your scalability needs.
Table: Comparison of ATF and TFF Perfusion Systems
| Characteristic | ATF (Alternating Tangential Flow) | TFF (Tangential Flow Filtration) |
|---|---|---|
| Operating Principle | Uses a gentle, diaphragm-based push-pull motion [31]. | Relies on constant crossflow across a membrane [31]. |
| Shear Stress | Lower shear, making it well-suited for sensitive cells like stem cells or primary T cells [31] [32]. | Higher, constant shear stress; better for robust cell lines [31]. |
| Best For | High-density cultures of shear-sensitive cells; applications where maintaining cell viability and function is critical [31] [32]. | Large-scale operations and cell lines that tolerate higher shear forces [31]. |
| Fouling Potential | Generally lower due to the alternating flow helping to keep the membrane clean [32]. | Can be more prone to fouling under certain conditions, requiring monitoring of transmembrane pressure (TMP) [31]. |
Q3: My microfluidic device keeps getting air bubbles, which disrupts flow and damages cells. How can I prevent and remove them?
A: Air bubbles are a common issue in microfluidic systems and can be mitigated with proper preparation and design.
- Prevention is Key:
- Degas All Fluids: Always degas your culture media and any other solutions before introducing them into the microfluidic system. This removes dissolved gasses that can come out of solution inside the chip [34].
- Pre-wet the Circuit: Ensure all channels and tubing are completely filled with liquid, leaving no air pockets, before connecting to the cell culture device [34].
- Design Considerations: Microfluidic devices with cultivation chambers designed so that fluid flow is restricted to supply channels can help isolate chambers from bubbles in the main channels [34].
- Removal Protocols: If bubbles occur, carefully flush the system with a generous amount of degassed medium or buffer. For PDMS-based devices, you can sometimes gently push bubbles out by applying a temporary increase in flow pressure or by manually manipulating the tubing [25].
Q4: How can I improve the stability and precision of flow control in my microfluidic perfusion system?
A: Unstable flow often stems from improper feedback loop configuration and insufficient flow resistance.
- Configure the Feedback Loop: If using a pressure-based flow controller, properly configure the PID (Proportional, Integral, Derivative) parameters for the flow feedback loop. Start with default values in your software (e.g., Elveflow Smart Interface) and fine-tune them incrementally to match your system's dynamics and avoid oscillations [25].
- Incorporate Flow Resistance: Adding deliberate flow resistance, such as a narrow or long microchannel before the culture chamber, introduces a necessary pressure drop. This stabilizes flow control, especially at low flow rates, by making the system more responsive to control inputs and reducing flow rate oscillations [25].
- Check Physical Connections: Ensure all cables (power, USB, sensor) and tubing are securely connected. Verify that the software correctly detects your flow controller and sensors [25].
Q5: What is the best method for retrieving spheroids or cells from a perfused microfluidic device for downstream analysis?
A: Spheroid retrieval has been a historical challenge for closed microfluidic systems. Modern solutions focus on modular design.
- Use Modular Devices: Employ microfluidic devices with a reversibly sealable design. These typically use a resealable adhesive layer, allowing you to detach the top cover after cultivation and directly access the wells for facile spheroid retrieval by pipetting [33].
- Open-Access Designs: Platforms designed with open wells that can be sealed for perfusion and then reopened are ideal for applications requiring post-culture analysis like genomics, transcriptomics, or high-resolution imaging [33].
- Plan Ahead: When designing your experiment, choose a device that balances the need for controlled perfusion with the requirement for easy sample access at the endpoint.
Experimental Protocols for Key Perfusion Applications
Protocol 1: Intensified CAR-T Cell Expansion in Serum-Free Perfusion Culture
This protocol demonstrates how to achieve high-density CAR-T cell expansion using an optimized perfusion process in serum-free (SF) and xeno-free (XF) medium, reducing expansion time and medium consumption [32].
Key Reagent Solutions:
- Bioreactor System: Ambr 250 High-Throughput Perfusion stirred-tank bioreactor system.
- Cell Retention Device: Alternating Tangential Flow (ATF) system.
- Culture Medium: Xeno-free, serum-free medium (e.g., 4Cell Nutri-T GMP).
- Cells: Activated human CAR-T cells.
Methodology:
- Inoculation: Inoculate the bioreactor with CAR-T cells at a density of (0.5 - 1.0 \times 10^6) cells/mL.
- Perfusion Initiation: Initiate perfusion at 48 hours post-inoculation.
- Perfusion Rate: Begin with a perfusion rate of 1.0 Vessel Volume per Day (VVD).
- Adaptive Control: Monitor glucose and lactate levels daily. Adjust the perfusion rate adaptively to maintain stable metabolite levels and support exponential growth. This can reduce medium consumption by over 10% [32].
- Harvesting: Harvest cells after 7-10 days of expansion, expecting final densities over (30 \times 10^6) cells/mL.
Expected Outcomes: This protocol can yield a 130 ± 9.7-fold expansion of CAR-T cells, achieving a therapeutic dose in half the time required by traditional fed-batch processes. The harvested cells predominantly express naïve and central memory markers, indicating high quality [32].
Protocol 2: Establishing Long-Term 3D Spheroid Culture in a Modular Microfluidic Device
This protocol is designed for cultivating and monitoring various spheroid types under continuous perfusion using a reconfigurable device [33].
Key Reagent Solutions:
- Microfluidic Device: A modular 3-layer device comprising a bottom well layer, a laser-cut reconfigurable adhesive layer, and a top PDMS cover with inlet/outlet [33].
- Cell Types: Mouse Embryonic Fibroblasts (MEFs), human induced Pluripotent Stem Cells (hiPSCs), or cancer cell lines (e.g., MDA-MB-231).
- Analysis Tool: Optical Coherence Tomography (OCT) system for non-invasive viability assessment.
Methodology:
- Device Configuration: Select the adhesive layer channel configuration (serial, parallel, or independent well connection) based on experimental needs [33].
- Cell Loading: Detach the top cover and pipette cell suspensions directly into the wells of the bottom layer. Allow spheroids to form.
- Initiate Perfusion: Seal the device with the top cover and connect to a syringe pump. Begin continuous perfusion at a low flow rate (e.g., 0.1 - 0.5 µL/min) to minimize initial shear stress.
- Long-Term Maintenance: Culture spheroids with daily monitoring of morphology via microscopy. Adjust flow rates as needed based on spheroid size and cell type.
- In-Situ Analysis: Image spheroids non-invasively using OCT to assess viability and internal structure through optical attenuation coefficients [33].
- Spheroid Retrieval: After cultivation, detach the top cover and retrieve spheroids by pipetting for downstream analysis.
Expected Outcomes: This system significantly improves spheroid growth, demonstrated by a 139.9% increase in MEF spheroid size over 14 days compared to static controls, while maintaining high sphericity [33].
The Scientist's Toolkit: Essential Research Reagents and Materials
Table: Key Materials for Microfluidic Perfusion Cell Culture
| Item | Function | Examples & Notes |
|---|---|---|
| PDMS-Based Microfluidic Chip | Biocompatible, transparent device for cell cultivation and live-cell imaging [34]. | Often custom-made via soft lithography; allows for gas exchange. |
| Perfusion Bioreactor | Provides a controlled environment for intensified cell expansion. | Ambr 250 High-Throughput Perfusion system; can be integrated with ATF [32]. |
| Flow/Pressure Controller | Precisely manipulates fluid flow within microchannels [25]. | Elveflow OB1 or similar; enables precise pressure-driven flow. |
| Flow Sensors | Provides real-time, in-line measurement of flow rates for feedback control [25]. | Elveflow MFS sensors; require calibration for liquids other than water. |
| Serum-Free (SF) Medium | Chemically defined medium that reduces process variability and safety concerns [32]. | 4Cell Nutri-T GMP; essential for clinical translation of cell therapies. |
| Cell Dissociation Reagents | Gently detaches adherent cells for subculturing or harvesting. | TrypLE Express (enzymatic) or Cell Dissociation Buffer (non-enzymatic) [35]. |
| Modular Spheroid Device | Reconfigurable platform for 3D spheroid culture with easy access for retrieval [33]. | Custom devices with reversible adhesive seals. |
Workflow and System Diagrams
Microfluidic Perfusion Experiment Workflow
Perfusion Media Exchange Optimization Logic
Frequently Asked Questions (FAQs)
Q1: What are the fundamental advantages of using microfluidics for dynamic drug stimulation over traditional methods?
Microfluidic systems provide unparalleled spatio-temporal control over the cellular microenvironment. They allow for the generation of stable, precise drug gradients and the application of multiple inputs with minimal reagent consumption [12]. The laminar flow inherent in micro-scale systems enables the creation of defined profiles that are difficult to achieve in macroscopic cultures. Furthermore, these platforms facilitate high-throughput, parallelized experiments and are compatible with live-cell imaging, allowing for real-time observation of cellular responses to dynamic stimuli [20] [12].
Q2: My microfluidic device is prone to air bubbles during setup, which disrupts flow and damages cells. How can I prevent this?
Air bubbles are a common challenge. To mitigate them, ensure all tubing and channels are properly primed with culture medium or phosphate-buffered saline (PBS) before connecting to the cell culture chamber [36]. Using degassed culture media can significantly reduce bubble formation. For existing systems, integrating commercial bubble traps into your setup is highly effective [36]. When loading your device, perform all steps slowly and carefully to minimize the introduction of air.
Q3: How can I design a simple microfluidic system for testing multiple drug concentrations in parallel?
A versatile design is the VersaLive platform, which operates in a multi-input mode [37]. This design features several independent culture chambers, each connected to its own input reservoir. By filling each reservoir with a different drug concentration and leveraging hydrostatic pressure-driven flow, you can simultaneously perfuse multiple chambers with different conditions on a single chip. This eliminates the need for complex external pumps and allows for operation using standard pipettes [37].
Q4: My mammalian cells are not adhering properly to the glass substrate in the PDMS chip. What could be the cause?
Poor cell adhesion can stem from several factors. First, confirm that the glass coverslip used for bonding is thoroughly cleaned and that the PDMS chip is properly bonded to the glass to prevent leakage and unstable surfaces [20]. Second, ensure the glass surface within the culture chamber is coated with an appropriate extracellular matrix protein, such as fibronectin, collagen, or poly-D-lysine, suitable for your specific cell type [20]. Finally, after loading cells, operate the chip in a "static" mode for several hours to overnight. This means filling all reservoirs to equalize pressure and stop flow, giving cells time to adhere without being subjected to shear stress [37].
Q5: I observe significant evaporation from the medium reservoirs during long-term cultures. How can I maintain medium volume and osmolarity?
Evaporation from open reservoirs is a major concern for experiment stability. A simple and effective solution is to pipette a small volume (e.g., 2.5 µL) of sterile, biocompatible mineral oil on top of the medium in each reservoir [37]. This creates a barrier that prevents evaporation without affecting gas exchange (O₂ and CO₂), thereby maintaining medium volume and solute concentration over extended periods.
Troubleshooting Guides
Problem 1: Unstable or Unintended Drug Gradients
Symptoms: Gradients do not form as predicted by simulation; gradients fluctuate over time or wash out quickly.
| Possible Cause | Diagnostic Steps | Corrective Actions |
|---|---|---|
| Incorrect Flow Rates | Use dye tests to visualize flow profile and stability [20]. | Use a syringe pump for precise, constant flow control. Re-run CFD simulations with adjusted parameters [20]. |
| Channel Geometry/Resistance | Review CAD design; check for unintended connections or blockages. | Optimize channel and chamber dimensions. Incorporate fluidic resistors to balance pressures between parallel channels [37]. |
| Fluidic Resistance Mismatch | Check for equal flow to all parallel chambers in multi-input mode. | Implement fluidic resistors (e.g., long, narrow serpentine channels) to ensure equal flow distribution to each culture chamber [37]. |
Protocol: Establishing a Stable Linear Gradient
- Chip Design: Use a standard T-channel or Christmas tree design. For the VersaLive platform, the multi-input mode can be adapted for gradient generation.
- Preparation: Load cells into the culture chamber and allow them to adhere in static mode overnight [37].
- Dye Test Validation: Before the experiment, introduce a visible dye in one input and plain medium in another to visually confirm the formation and stability of the gradient under your intended flow rate.
- Experiment Initiation: Switch the input reservoirs to contain plain medium and the drug solution, respectively. Initiate flow using a pump or hydrostatic pressure.
- Live-Cell Imaging: Place the chip on a microscope stage to monitor real-time cellular responses, such as calcium signaling or protein translocation [37].
Problem 2: Contamination in Long-Term Perfusion Cultures
Symptoms: Cloudy medium, sudden pH drop, or visible microbial growth under the microscope.
| Possible Cause | Diagnostic Steps | Corrective Actions |
|---|---|---|
| Non-Sterile Setup | Inspect for breaches in sterile technique. | Perform all device loading and medium changes in a laminar flow hood. Use sterile, filtered culture media and reagents [38]. |
| Contaminated Sources | Check cell stock and all media/reagents for contamination. | Use antibiotics/antimycotics in the medium (if experimental goals allow). Regularly test cell cultures for mycoplasma [38]. |
| Leaky Connections | Check for medium seepage at tubing-chip interfaces. | Ensure tight seals at all ports and connections. Use dedicated microfluidic connectors instead of relying on press-fit tubing alone [36]. |
Problem 3: Low Cell Viability in Perfusion Chambers
Symptoms: Cells detach, become rounded, or show signs of apoptosis/necrosis during or after perfusion.
| Possible Cause | Diagnostic Steps | Corrective Actions |
|---|---|---|
| Excessive Shear Stress | Calculate wall shear stress in chambers; observe cell morphology. | Reduce perfusion flow rate. Redesign chambers to be shallower or wider to lower shear forces [20]. |
| Insufficient Nutrient Supply | Check if medium is depleted of glucose/glutamine. | Increase medium perfusion rate or concentration of nutrients. Ensure continuous flow from a sufficient reservoir [38]. |
| Toxic Leachates or Absorption | Review material compatibility. | Consider alternative materials to PDMS (e.g., polystyrene) if small hydrophobic molecule absorption is skewing drug concentrations [12]. Pre-condition PDMS by soaking in medium [12]. |
Workflow for Dynamic Stimulation and Analysis
Problem 4: Inconsistent Results Between Parallel Chambers or Experimental Repeats
Symptoms: High variability in readouts from chambers supposed to be identical; poor reproducibility.
| Possible Cause | Diagnostic Steps | Corrective Actions |
|---|---|---|
| Variable Cell Seeding | Quantify initial cell number/density in each chamber. | Standardize cell concentration and loading protocol. Use integrated cell filters to ensure uniform cell trapping [37]. |
| Flow Rate Fluctuations | Calibrate pumps; check for obstructions. | Use high-precision pumps. For hydrostatic systems, ensure all reservoirs are at the same height and top them with oil to prevent evaporation-induced flow changes [37]. |
| Manual Handling Errors | Audit protocol steps for consistency. | Create a detailed, step-by-step Standard Operating Procedure (SOP) for all stages, from chip preparation to data analysis [38]. |
The Scientist's Toolkit: Essential Research Reagents & Materials
| Item | Function & Application | Key Considerations |
|---|---|---|
| PDMS Chip | The core platform for cell culture, offering biocompatibility and transparency for microscopy [20] [12]. | Can absorb small hydrophobic molecules; may require pre-conditioning [12]. |
| ENFit or Oral Syringe | Safe administration of oral/enteral liquid medications to prevent fatal IV misconnection [39]. | Never use parenteral syringes for oral liquids; ensure consistent availability [39]. |
| Precision Syringe Pump | Delivers consistent, pulsed-free flow for stable gradient generation and compound delivery. | Essential for protocols requiring high temporal precision and flow rate stability. |
| Bubble Trap | Removes air bubbles from the medium stream before it enters the culture chamber, protecting cells [36]. | A critical accessory for maintaining continuous, uninterrupted perfusion. |
| Mineral Oil | Layered on medium reservoirs to prevent evaporation during long-term experiments [37]. | Maintains medium osmolarity and volume over 24+ hours. |
| Extracellular Matrix (ECM) Proteins | Coats glass surfaces to promote mammalian cell adhesion and spreading (e.g., fibronectin, collagen). | Select based on specific cell type requirements. |
| Real-Time Biosensors | Integrated or added sensors for continuous monitoring of pH, O₂, and metabolites [38]. | Enables real-time environmental monitoring without disturbing cultures. |
Protocol: Multi-Input Drug Screening (e.g., Stress Response)
- Cell Loading: Seed a CHOP::GFP reporter cell line (e.g., CHO-K1) into a multi-chamber device like VersaLive. Use static mode overnight for adhesion [37].
- Experimental Setup: Empty all reservoirs. Switch to multi-input mode by adding fresh medium to some reservoirs and drug (e.g., Tunicamycin) dissolved in medium to others [37].
- Live-Cell Imaging: Place the chip on an inverted fluorescence microscope. Image each chamber at regular intervals (e.g., every 15 minutes for 20 hours) [37].
- Data Quantification: Quantify the mean GFP fluorescence intensity per cell or chamber over time to track the activation dynamics of the stress response pathway [37].
Microfluidic Perfusion Modes for Stimulation
Advanced co-culture systems that integrate multiple cell types within microfluidic platforms represent a significant leap forward in modeling physiological conditions for biomedical research. These systems enable the study of complex cell-cell interactions within precisely controlled microenvironments. However, researchers frequently encounter technical challenges that can compromise experimental reproducibility and success. This technical support center addresses these hurdles with practical troubleshooting guidance and detailed protocols to enhance the reliability of your co-culture experiments.
Frequently Asked Questions (FAQs)
FAQ 1: What are the critical factors for maintaining multiple cell types in a shared medium? Finding a common medium that supports all cell types in a co-culture system is fundamental. The medium must provide essential nutrients, growth factors, and physicochemical conditions suitable for each lineage. It is recommended to research existing literature for established co-culture medium formulations [36]. Begin by testing a base medium common to all cell types and systematically adjust components, validating the health and function of each cell population throughout the process.
FAQ 2: How can I prevent contamination in long-term microfluidic co-culture experiments? Preventing contamination requires stringent aseptic technique reinforced by systematic protocols. Strengthen your lab practices by using sterile reagents and consumables, following strict biosafety protocols when handling cultures, and regularly testing for subtle contaminants like mycoplasma [40]. Implement routine checkpoint monitoring and automate documentation with digital logs to minimize human error [40]. For microfluidic systems, ensure all connections are secure and use bubble traps to maintain system integrity [36].
FAQ 3: Why is my co-culture viability low after several days, and how can I improve it? Low co-culture viability often stems from insufficient nutrient supply, waste accumulation, or suboptimal cell densities. In microfluidic systems, this can be addressed by optimizing perfusion rates to ensure adequate nutrient delivery and waste removal [36]. Monitor key parameters like pH, oxygen, and glucose levels in real-time using biosensors [40]. Furthermore, ensure that the seeding density for each cell type is optimized for your specific co-culture configuration to prevent overcrowding or insufficient cell-cell contact.
FAQ 4: What is the best method for analyzing cell-type-specific responses in a co-culture? Analyzing responses from individual cell types within a complex co-culture requires strategic cell tracking and labeling. Fluorescent labeling (for example, using cell-tracker dyes or transfection with fluorescent proteins) allows for visual distinction between cell types when using live-cell imaging [40]. For endpoint analyses, cell sorting techniques can be employed to separate populations based on specific surface markers before downstream molecular analysis (e.g., RNA sequencing). Recent advancements also include CRISPR-powered biosensors that tag live cells for fluorescence-based monitoring, enabling real-time tracking of specific cellular events [40].
Troubleshooting Guides
Problem 1: Rapid pH Shift in Culture Medium
| Possible Cause | Recommended Solution |
|---|---|
| Incorrect CO2 tension for bicarbonate buffer | Adjust CO2 percentage based on sodium bicarbonate concentration: 1.5-2.2 g/L needs 5% CO2; 2.2-3.4 g/L needs 7% CO2; >3.5 g/L needs 10% CO2 [41]. |
| Overly tight caps on culture vessels | Loosen caps one-quarter turn to allow for gas exchange [41]. |
| Insufficient buffering capacity | Add HEPES buffer to a final concentration of 10-25 mM to increase buffering capacity [41]. |
| Metabolic byproduct accumulation | Increase the frequency of medium changes or optimize the perfusion rate in microfluidic systems to remove acidic waste products more efficiently. |
Problem 2: Poor Cell Viability After Seeding in Microfluidic Chips
| Possible Cause | Recommended Solution |
|---|---|
| Toxic residue in PDMS chips | Ensure proper curing and sterilization of PDMS. Consider pre-rinsing channels with culture medium to condition surfaces before cell introduction. |
| Excessive shear stress from flow | Initiate cultures under static conditions for several hours to allow for cell attachment before gradually introducing and ramping up fluid flow [36]. |
| Incorrect cell seeding density | Optimize the concentration of your cell suspension. A density that is too low can lead to poor paracrine signaling and anoikis, while excessive density can cause nutrient depletion. |
| Air bubbles in microfluidic channels | Use degassed media and incorporate bubble traps into your microfluidic setup to prevent bubbles from damaging cells or blocking nutrient supply [36]. |
Problem 3: Inconsistent Co-culture Results and Poor Reproducibility
| Challenge | Strategy for Improvement |
|---|---|
| Inconsistent cell sourcing and handling | Use low-passage cells and establish standardized protocols for thawing, passaging, and maintaining each cell type used in the co-culture [41] [42]. |
| Variable initial cell ratios | Precisely count cells using an automated cell counter and systematically test different ratios to identify the optimal combination for reproducible interactions. |
| Lack of real-time monitoring | Implement automated imaging systems and non-invasive biosensors to track key parameters (pH, O2) and cell morphology continuously, allowing for early problem detection [40]. |
| Uncontrolled microenvironment | Utilize microfluidic systems to maintain stable gradients, shear stress, and perfusion, which increases reproducibility in 3D cultures by up to 50% [40]. |
Essential Experimental Protocols
Protocol 1: Establishing a Basic Tumor-Stroma Co-culture
This protocol outlines the steps for co-culturing patient-derived tumor organoids with stromal cells, such as cancer-associated fibroblasts (CAFs), to study tumor-microenvironment interactions [43] [44].
Key Materials:
- Extracellular Matrix (ECM): Matrigel or other biocompatible ECM hydrogels [43].
- Basal Medium: Advanced DMEM/F12, supplemented with appropriate growth factors (e.g., EGF, Noggin, R-spondin) depending on the tumor organoid type [45] [43].
- Stromal Cells: CAFs, immune cells, or endothelial cells sourced from commercial lines or patient samples.
Methodology:
- Prepare Tumor Organoids: Thaw or harvest tumor organoids and resuspend them in a cold, ECM-based scaffold (e.g., Matrigel) at a defined density [45] [43].
- Seed the Co-culture: Plate the cell-ECM mixture in a pre-warmed culture vessel (e.g., a well plate or microfluidic chamber) and polymerize at 37°C for 20-30 minutes.
- Introduce Stromal Cells: After polymerization, carefully overlay the pre-cultured stromal cells, suspended in the shared co-culture medium. For microfluidic devices, this may involve seeding through a separate channel.
- Maintain the Culture: Feed the co-culture with fresh medium every 2-3 days. In microfluidic systems, apply continuous perfusion at an optimized flow rate.
- Monitor and Analyze: Regularly monitor the culture using microscopy. Endpoint analyses can include immunofluorescence staining for cell-type-specific markers or sequencing to analyze differential gene expression.
The following workflow diagram summarizes the key stages of this co-culture establishment process:
Protocol 2: Transition to Apical-Out Organoid Polarity for Microbial Co-culture
Adapted from a detailed protocol for generating organoids from colorectal tissues, this method enables direct access to the luminal surface for studies involving microbial interactions or drug permeability testing [45].
Key Materials:
- Established Organoids: Mature organoids derived from normal or tumor tissue.
- Polarity Reversal Agents: Components such as withdrawal of specific niche factors or addition of chemical modulators to disrupt basal-side attachments.
Methodology:
- Grow Standard Organoids: Establish and maintain basolateral-out organoids using standard, niche factor-dependent culture methods in an ECM scaffold [45].
- Induce Polarity Reversal: To trigger the apical-out transition, carefully remove the ECM scaffold and transfer organoids to a suspension culture system. Withdraw specific basal niche factors (e.g., Wnt) from the medium while retaining apical survival signals.
- Validate the Transition: Confirm the successful reversal of polarity using immunofluorescence staining for apical-specific markers (e.g., lectins, ZO-1) and basal markers (e.g., integrins). Apical-out organoids will show these markers inverted compared to their standard configuration.
- Proceed with Co-culture: Once polarity is confirmed, the apical-out organoids are ready for direct microbial inoculation [45] [46] or other luminal exposure studies.
Research Reagent Solutions
The table below catalogs essential materials and their functions for establishing and maintaining advanced co-culture models.
| Reagent / Material | Primary Function | Application Notes |
|---|---|---|
| Matrigel | Provides a biologically active ECM scaffold for 3D cell growth and self-organization. | Critical for organoid and spheroid culture; composition can vary between lots [43]. |
| Niche Factors (Wnt3A, R-spondin, Noggin) | Maintains stemness and promotes proliferation in epithelial and organoid cultures. | Essential components in "ENR" medium for many gastrointestinal organoids [45] [43]. |
| Fetal Bovine Serum (FBS) | Supplies a complex mixture of proteins, growth factors, and hormones. | Supports growth of many stromal cell types; lot-to-lot variability requires testing [41] [42]. |
| HEPES Buffer | Provides additional pH buffering capacity independent of CO2. | Useful for experiments outside incubators or when handling samples for extended periods [41]. |
| GlutaMAX Supplement | A stable dipeptide substitute for L-glutamine. | Prevents glutamine degradation in media, reducing ammonia buildup and maintaining culture stability [41]. |
| PDMS (Polydimethylsiloxane) | Elastomeric polymer used for prototyping microfluidic chips. | Biocompatible and gas-permeable, but can absorb small hydrophobic molecules [36] [12]. |
Advanced Technique: Integrating Microfluidics with Co-culture
Microfluidic cell culture, often referred to as "organ-on-a-chip," represents the next step in sophistication for co-culture models [36] [12]. These systems provide high spatio-temporal control over the cellular microenvironment, allowing for the establishment of physiological flow, shear stress, and precise gradient formation [36] [12].
Key Advantages:
- Controlled Microenvironment: Enables the simulation of mechanical forces like fluid shear stress, which is critical for endothelial and other cell types [36].
- High-Throughput Potential: Integrated micromechanical valves allow for automation and parallelization, facilitating the screening of multiple conditions [12].
- Modeling Tissue-Tissue Interfaces: Microfluidics excel at modeling physiological barriers (e.g., gut epithelium, blood-brain barrier) and inter-organ communication [36].
Considerations for Implementation:
- Material Absorption: Be aware that common chip material PDMS can absorb small hydrophobic molecules, potentially depleting drugs or signaling molecules from the medium [12]. Alternative materials like polystyrene are being explored [36].
- Practical Hurdles: Common operational challenges include managing air bubbles and preventing leaks, which can be mitigated using commercially available bubble traps and secure tubing adapters [36].
- System Complexity: The initial setup can be space-consuming and non-intuitive. It is highly recommended to seek hands-on training and maintain communication with equipment suppliers [36].
A Systematic Troubleshooting Guide for Common Integration Challenges
Air bubbles are among the most recurring and detrimental issues in microfluidic systems, particularly when integrating mammalian cell cultures. Their presence can cause flow instability, increase fluidic resistance, damage sensitive cells, and lead to significant artifacts in experimental data [47]. This guide provides targeted, practical solutions for researchers and drug development professionals to troubleshoot and resolve bubble-related issues, ensuring the reliability of microfluidic-mammalian cell culture integration.
Troubleshooting Guide: FAQs on Air Bubbles
Q1: What are the primary causes of air bubbles in my microfluidic cell culture setup?
Bubbles can originate from several sources in a microfluidic experiment. Identifying the root cause is the first step toward elimination.
- Initial Setup and Fluid Switching: Residual air can circulate when first filling the setup or when changing the injected liquid during an experiment [47].
- Material Permeability: Porous materials like PDMS, commonly used in microfluidics, can allow gas permeation, leading to bubble formation, especially in long-term experiments [47] [48].
- Dissolved Gases: Gas contained in the liquid can come out of solution and form bubbles, particularly when liquids are heated [47].
- Leaking Fittings: Air can be introduced into the system if fittings are not perfectly sealed [47].
Q2: How do air bubbles specifically disrupt mammalian cell culture experiments?
Bubbles interfere with both the physical flow and the biological components of an experiment.
- Flow Instability and Compliance: Moving or compressing bubbles cause significant flow rate instability. A trapped bubble acts as a compliance, absorbing pressure changes and degrading system responsiveness [47].
- Cellular Damage: The interfacial tension of air bubbles can apply stress to cells, leading to cellular death [47]. Furthermore, the interfaces can cause unwanted aggregation of proteins or particles [47].
- Increased Fluidic Resistance: A bubble trapped in a microchannel reduces the effective diameter for liquid flow, increasing fluidic resistance and, when using syringe pumps, causing a potentially damaging rise in pressure [47].
Q3: What are the most effective preventive measures for bubble formation?
Prevention is the most efficient strategy for managing bubbles.
- Microfluidic Chip Design: Avoid acute angles in channel designs to decrease the risk of bubbles adhering [47].
- Leak-Free Fittings: Ensure all fittings are secure. Using Teflon tape can help create a leak-free setup [47].
- Liquid Degassing: Degassing liquids prior to the experiment, especially if they will be heated, reduces one source of bubble formation [47].
- Use an Injection Loop: Employing an injection loop or valve matrices when adding new liquid can prevent air from being introduced into the main system [47].
Q4: My channels already have bubbles. What are the best methods to remove them?
Several active and passive corrective measures can eliminate existing bubbles.
- Pressure Pulses: Applying square-shaped pressure pulses via a pressure controller is an effective way to detach bubbles from tubing and channel walls [47].
- Bubble Dissolution: Applying pressure at each inlet of the chip can force air bubbles to dissolve into the liquid [47].
- Soft Surfactants: Flushing the system with a buffer containing a soft surfactant, such as SBS, can help detach bubbles by modifying surface tension [47].
- Bubble Traps and Degassing Systems: Integrating a commercial bubble trap or a microfabricated bubble trap into your setup provides a dedicated means to remove bubbles [47] [49]. For PDMS devices, exploiting the material's gas permeability can passively remove bubbles over time [48].
- Electrochemical Detachment (Emerging Method): A novel method uses electrochemically generated bubbles to create shear stress that detaches adhered cells or other foulants from surfaces. This on-demand, physical method maintains high cell viability and operates without generating biocides in a properly configured system [50] [51].
Experimental Protocols & Data
Protocol 1: Passive Bubble Removal via Gas-Permeable Walls
This methodology is ideal for long-term, pumpless experiments using PDMS devices [48].
- Chip Design and Fabrication: Fabricate your microfluidic device from a gas-permeable material like PDMS. The dynamics of bubble removal are influenced by channel geometry and PDMS thickness.
- Priming: Introduce your liquid into the microchannel. Bubbles may become trapped in dead-end sections.
- Incubation: Allow the chip to sit. Gas from the trapped bubble will permeate through the PDMS walls, causing the bubble volume to decrease exponentially over time.
- Monitoring: The refilling timescale can be predicted and monitored. A simple analytical model coupling capillarity and gas diffusion shows that bubble length decays exponentially with time [48].
Protocol 2: Active Cell Detachment via Electrochemical Bubbles
This protocol is for on-demand detachment of cells from an electrode surface within a microfluidic or millifluidic device, as demonstrated in recent studies [50] [51].
- Platform Setup: Construct a flow chamber with a transparent gold electrode (e.g., 10 nm gold film on glass). Use a dual-fingered electrode design to minimize ohmic losses.
- Prevent Biocide Formation: To ensure cell viability, use a chloride-free electrolyte (e.g., 1 M potassium bicarbonate). This prevents the formation of sodium hypochlorite (bleach) at the anode [51].
- Cell Adhesion and Medium Exchange: Introduce your cell suspension (e.g., C. vulgaris microalgae or MG-63 mammalian cells) into the channel and allow cells to adhere for 2 hours. Flush out the culture medium and replace it with the chloride-free electrolyte.
- Bubble Generation and Detachment: Apply a set current density (e.g., for 10 seconds) across the electrodes to generate bubbles directly on the surface where cells are adhered. The shear stress from the departing bubbles will detach the cells.
- Cell Collection: Apply a low flow rate to flush out the detached, viable cells for collection and downstream analysis.
The table below summarizes key quantitative findings from recent research on bubble dynamics and removal.
Table 1: Quantitative Data on Bubble Formation and Removal
| Parameter | Effect/Value | Context / Experimental Conditions |
|---|---|---|
| Bubble Reduction in SDIO Design | 92.2% reduction in bubble formation [52] | Compared to traditional inlet/outlet designs across various flow rates. |
| Bubble Removal Dynamics | Exponential decay of trapped air length with time [48] | Observed in PDMS-based dead-end microchannels; driven by gas permeation. |
| Electrochemical Cell Detachment | >85% detachment efficiency (≤15% algae coverage remaining) [51] | Achieved using electrochemical bubbles in a chloride-free medium with high current density. |
| Algae Adhesion Strength | 50% detachment at 9.5 Pa wall shear stress [51] | Measured for C. vulgaris on a gold electrode, providing a benchmark for detachment methods. |
Workflow and Strategy Visualization
The following diagram illustrates a decision-making workflow for addressing bubble-related issues in a microfluidic cell culture system.
Bubble Troubleshooting Workflow
The Scientist's Toolkit: Essential Reagents & Materials
Table 2: Key Research Reagent Solutions for Bubble Management
| Item | Primary Function | Application Notes |
|---|---|---|
| Polydimethylsiloxane (PDMS) [48] [53] | Gas-permeable elastomer for chip fabrication. | Enables passive bubble removal via gas permeation; ideal for long-term cell culture. |
| Bubble Trap Kits [47] | In-line device to capture and remove air bubbles from the fluidic path. | A crucial hardware solution for preventing bubbles from reaching the microfluidic chip. |
| Soft Surfactants (e.g., SBS) [47] | Reduces liquid surface tension to help detach and flush out bubbles. | Use a compatible concentration to avoid adverse effects on cells or assays. |
| Chloride-Free Electrolyte (e.g., 1M KHCO₃) [51] | Enables biocide-free electrochemical bubble generation for cell detachment. | Essential for maintaining high cell viability during on-demand electrochemical detachment. |
| Degassing Equipment [47] | Removes dissolved gases from liquids before they enter the microfluidic system. | Critical for experiments involving heating or sensitive to bubble nucleation. |
| Transparent Gold Electrode [51] | Provides a catalytically active, transparent surface for electrochemical bubble generation. | Allows for real-time visualization of bubble dynamics and cell detachment. |
Troubleshooting Guides
Guide 1: Diagnosing and Mitigating Shear Stress in Microfluidic Cell Cultures
Q: My cells are detaching or showing abnormal morphology in my microfluidic device. How can I determine if shear stress is the cause and what can I do to fix it?
Shear stress, the frictional force created by fluid flow acting on cells, is a common cause of cell viability issues in microfluidic systems [54]. The following guide will help you systematically diagnose and address shear stress-related problems.
Diagnosis:
- Visual Indicators: Cells elongating or aligning in the direction of flow, unexpected detachment from substrates, or abnormal cytoskeletal organization [54] [55].
- Quantitative Analysis: Use cell-based sensors that fluoresce upon shear stress pathway activation. These genetically encoded sensors can detect shear stress as low as 2 dynes/cm² when applied for 30 minutes [56].
Key Mitigation Strategies:
Optimize Flow Parameters: Calculate and adjust the wall shear stress, which is typically highest at the channel walls where adherent cells are located [54]. For Newtonian fluids, shear stress (τ) can be computed as: τ = η × (∂v/∂z) where η is the viscosity and (∂v/∂z) is the velocity gradient or shear rate [54] [55]. Use precise flow control systems (e.g., pressure-controlled pumps) to maintain stable, reproducible flow rates and avoid damaging fluctuations [54].
Mimic Physiological Conditions: Design your experiment to apply biologically relevant shear stress levels. Reference the table below for physiologically appropriate values [55].
Table 1: Physiological Shear Stress Ranges for Different Cell Types
| Cell/Tissue Type | Shear Stress (Pa) | Shear Stress (dyn/cm²) |
|---|---|---|
| Arteries | 1 - 2 | 10 - 20 |
| Veins | 0.1 - 0.6 | 1 - 6 |
| Human Kidney | 0.03 - 0.12 | 0.3 - 1.2 |
| Mouse Embryonic Kidney | 0.04 - 0.5 | 0.4 - 5 |
| Alveolar Epithelial Cells | 0.4 - 1.5 | 4 - 15 |
- Device Design Considerations: Modify your microfluidic channel geometry. Shear stress can be reduced by increasing channel height or width. For simple rectangular channels, the wall shear stress can be computed as τ = (6ηQ)/(h²W), where Q is the flow rate, and h and W are the channel height and width, respectively [54].
Experimental Protocol: Using a Cell-Based Shear Stress Sensor [56]
- Principle: A genetically encoded fluorescent sensor where fluorescence turns on upon activation of the Early Growth Factor-1 (EGR-1) pathway, which is specifically induced by fluid shear stress.
- Materials:
- NIH3T3 fibroblast cells (or other relevant cell line) transfected with the EGR-1 promoter-driven reporter plasmid (e.g., TurboRFP).
- Microfluidic device.
- Precision flow control system.
- Microscope or flow cytometer for fluorescence detection.
- Methodology:
- Seed the sensor cells into your microfluidic device and allow them to adhere.
- Expose the cells to the experimental flow conditions.
- Quantify the induced fluorescence using microscopy or flow cytometry. The intensity of fluorescence is proportional to the level of shear stress pathway activation.
- Interpretation: Increased fluorescence indicates that the cells are experiencing significant shear stress, confirming it as a likely factor in viability issues. This allows for direct evaluation of the impact of your microfluidic environment on cell physiology.
Guide 2: Identifying and Controlling Biological Contamination
Q: How can I tell if my cell culture is contaminated and how should I decontaminate an irreplaceable microfluidic culture?
Biological contaminants like bacteria, yeast, mold, and mycoplasma can compromise cell health and experimental integrity [57].
Diagnosis:
- Bacteria: Culture medium appears turbid (cloudy) with a sudden drop in pH. Under microscopy, tiny, moving granules are visible between cells [57].
- Yeast: Medium becomes turbid, often with a later-stage increase in pH. Microscopy reveals ovoid or spherical particles that may bud off smaller particles [57].
- Mold: Appears as thin, wispy filaments (hyphae) or denser clumps of spores under microscopy [57].
- Mycoplasma: Requires specialized testing (e.g., PCR, immunostaining) as it is often not visible under standard microscopy and does not cause medium turbidity [57].
Prevention and Control:
- Aseptic Technique: Always practice sterile techniques when handling chips and media. Filter all fluids before introducing them into the microfluidic chip to remove particulates and microbes [58].
- Antibiotic Use: Avoid the routine use of antibiotics in culture media, as this can mask low-level contamination and promote antibiotic-resistant strains. Use them only as a last resort for short-term applications [57].
Experimental Protocol: Decontamination of a Precious Cell Culture [57]
- Principle: Use high concentrations of antibiotics or antimycotics to eliminate contaminants, preceded by a toxicity test to determine a safe, effective dose for your specific cell line.
- Materials:
- Antibiotic or antimycotic of choice.
- Multi-well culture plate or small flasks.
- Dissociation reagent for cells.
- Methodology:
- Dissociate, count, and dilute the contaminated cells in antibiotic-free medium.
- Dispense the cell suspension into a multi-well plate. Add your chosen antibiotic at a range of concentrations to different wells.
- Observe the cells daily for signs of toxicity (e.g., sloughing, vacuole appearance, decrease in confluency, cell rounding).
- Once the toxic level is identified, culture the cells for 2-3 passages using the antibiotic at a concentration one- to two-fold lower than the toxic concentration.
- Culture the cells for one passage in antibiotic-free media.
- Repeat the antibiotic treatment cycle.
- Finally, culture the cells in antibiotic-free medium for 4-6 passages to confirm the contamination has been eliminated.
- Interpretation: Successful decontamination is achieved if the culture remains free of contaminant signs and the cells appear healthy after the antibiotic-free period. Always maintain a backup culture if possible.
Guide 3: Assessing and Preventing Material Toxicity
Q: I am 3D printing a custom microfluidic device for cell culture. How can I ensure the photopolymer resin is not toxic to my cells?
Materials like some 3D printing resins can leach cytotoxic compounds, which is especially critical in microfluidic systems with high surface-to-volume ratios [59].
Diagnosis:
- Cell Viability Assays: Significant reduction in cell viability, proliferation, or metabolic activity when cells are cultured in the presence of the fabricated device part, compared to standard tissue culture plastic [59].
Mitigation Strategies:
- Material Selection: Choose photopolymers that are certified as biocompatible according to standards like ISO 10993-5:2009. Be aware that even certified materials may still exhibit some toxic effects in sensitive systems [59].
- Device Coating: Apply an inert, biocompatible coating to act as a barrier between the toxic material and your cells. Vapor-deposited Parylene coating has been shown to completely protect mesenchymal stem cells from the toxic effects of several photopolymers [59].
Experimental Protocol: Cytotoxicity Testing of 3D-Printed Materials [59]
- Principle: Directly incubate cells with the printed material and assess viability using standardized assays.
- Materials:
- Stereolithography (SLA)-printed test pieces of the photopolymer.
- Primary human mesenchymal stem cells (MSCs) or another relevant cell line.
- Cell culture plates.
- Viability assay kits (e.g., MTT, AlamarBlue, live/dead staining).
- Methodology:
- Print and post-process (e.g., wash, cure) the test pieces according to the manufacturer's instructions.
- Seed cells into culture plates and introduce the sterilized test pieces into the wells, ensuring they are fully submerged in medium but not physically crushing the cells.
- Incubate for 24-72 hours.
- Perform viability assays according to kit protocols. Compare the results to control cells cultured without the test material.
- Interpretation: A statistically significant reduction in viability in test wells indicates the material is cytotoxic. A protective coating like Parylene should be applied, or a different material should be selected.
Frequently Asked Questions (FAQs)
Q: What is the most effective way to clean my PDMS microfluidic chip after an experiment to prevent cross-contamination? A: For routine cleaning, flush the channels with a warm water and mild soap solution, followed by a thorough rinse with demineralized (DEMI) water, and air dry completely [58]. For stubborn lipid or polymerized residues, use the same solvent that dissolved the material during your process (e.g., acetonitrile for lipids), and consider using an ultrasonic bath filled with warm water. Avoid strong solvents like acetone or toluene, as they can swell or degrade PDMS [58].
Q: Can microfluidic perfusion culture actually improve my cell models? A: Yes. Perfusion culture provides dynamic fluid flow that mimics in vivo conditions like blood flow, promoting nutrient exchange, waste removal, and the application of physiologically relevant shear stress [60] [61]. For example, perfusion culture of human kidney proximal tubule epithelial cells in microfluidic devices has been shown to improve cell polarization, function, and physiological response compared to static culture [61].
Q: My microfluidic channels are frequently getting blocked. How can I prevent this? A: Always filter fluids before introducing them into the chip to minimize particulates [58]. For existing blockages, techniques like backflushing (reversing the flow direction) or sonication in an ultrasonic bath (using ethanol or DEMI water) can be effective for dislodging debris [58].
Q: Are there any key differences between macroscopic and microfluidic cell culture I should know about? A: Yes. The smaller scales in microfluidics lead to a higher surface-to-volume ratio, making cells more susceptible to material toxicity and evaporation [21] [59]. Shear stress, often negligible in traditional culture, becomes a major factor to control. Furthermore, standard protocols for seeding, feeding, and coating may need to be re-optimized for the microfluidic environment [21].
The Scientist's Toolkit: Research Reagent Solutions
Table 2: Essential Reagents and Materials for Troubleshooting Microfluidic Cell Culture
| Item | Primary Function | Application Notes |
|---|---|---|
| Cell-based Shear Stress Sensor [56] | Reports FSS pathway activation via fluorescence. | Enables direct, quantitative assessment of shear stress impact on cell physiology within the device. |
| Parylene Coating [59] | Inert, biocompatible barrier polymer. | Shields cells from cytotoxic leachables from 3D-printed or other device materials. Applied via vapor deposition. |
| Precision Pressure/Flow Controller [54] [60] | Delivers stable, reproducible flow rates. | Critical for applying consistent, physiologically relevant shear stresses and avoiding damaging flow fluctuations. |
| Tween 20 Detergent [58] | Mild surfactant for cleaning. | Effective for removing coating residues from PDMS and polymer chips without causing damage. |
| Isopropyl Alcohol (IPA) / Ethanol [58] | Solvents for routine cleaning. | Effective for flushing contaminants from glass and some polymer chips. Check chemical compatibility first. |
Appendices: Visual Workflows
Diagram 1: Shear Stress Sensor Pathway
Diagram 2: Material Toxicity Testing
Diagram 3: Contamination Response
Optimizing Media Formulations and Flow Rates for Specific Cell Lines using Active Learning
Troubleshooting Common Experimental Challenges
FAQ: Why is my active learning model failing to converge on an improved media formulation?
Active learning model failure often stems from insufficient initial data or high experimental noise. To address this:
- Expand Initial Training Set: Ensure your initial dataset covers a wide, logarithmic concentration gradient of all medium components to provide a broad foundation for the model. Testing 232 initial medium combinations for 29 components has been shown to be effective [62].
- Implement Error-Aware Data Processing: Use biology-aware machine learning that explicitly accounts for biological variability and experimental errors. This platform can fine-tune a 57-component serum-free medium, achieving approximately 60% higher cell concentration than commercial alternatives [63].
- Verify Cell Viability Metrics: Use reliable, high-throughput methods like CCK-8 assay measuring NAD(P)H abundance (A450) for consistent data acquisition [62].
FAQ: How can I reduce the time required for active learning optimization cycles?
Implement a time-saving mode using earlier endpoint measurements. Research shows that cellular NAD(P)H abundance measurements at 96 hours significantly correlate with final 168-hour results. Using this earlier timepoint for model training can shorten optimization cycles by hundreds of hours while still significantly improving final cell culture outcomes [62].
FAQ: What are the optimal microfluidic chamber designs for mammalian cell culture during active learning experiments?
Choose chamber designs based on your specific research questions and cell type:
Table: Microfluidic Cultivation Chamber Designs
| Chamber Type | Best For | Cell Freedom | Key Considerations |
|---|---|---|---|
| 3D Chambers | Tissues, densely packed cultures | High - 3D space | Nutrient gradients common; difficult cell tracking [20] |
| 2D Chambers | Monolayered microcolonies | Medium - 2D plane | Superior for monitoring growth, division, morphology [20] |
| 1D Chambers | Long-term studies over generations | Low - 1D line | Easy tracking; ideal for phylogenetic trees [20] |
| 0D Chambers | Single-cell behavior analysis | None - single point | No cell-cell interaction; perfect for isogenic studies [20] |
FAQ: How do I control shear stress in microfluidic devices to maintain cell viability?
Shear stress is critical for cell morphology and behavior. Different cell types require different shear stress regimes [64]:
- Low Shear Stress: Essential for stem cell culture to maintain viability and undifferentiated states.
- High Shear Stress: Required for endothelial cell studies to mimic blood flow conditions.
- Design Control: Adjust channel geometries, flow rates, and materials to achieve desired shear forces. Use real-time simulation tools to optimize parameters before fabrication [64].
FAQ: My DMF (Digital Microfluidics) system is experiencing biofouling and evaporation during long-term culture. What solutions are available?
These are common DMF challenges, particularly for cultures extending to 60 days [4]:
- Biofouling Mitigation: Consider periodic surface regeneration or investigate alternative dielectric materials compatible with your cell type.
- Evaporation Control: Ensure proper plate sealing and maintain humidity control in incubation environments. For imaging, use sealed chambers or environmental controls.
- Material Selection: Opt for glass-based DMF chips rather than PCB-based platforms for better humidity tolerance and stability during long-term culture [4].
Experimental Protocols & Methodologies
Active Learning Workflow for Medium Optimization
The following diagram illustrates the complete active learning workflow for optimizing cell culture media:
Protocol: Active Learning Setup for Medium Optimization
Initial Experimental Design
- Select components for optimization (e.g., 29 components based on EMEM medium, excluding phenol red and penicillin-streptomycin) [62].
- Prepare medium combinations with components varied on a logarithmic scale to ensure broad data variation.
- Use HeLa-S3 or CHO-K1 cells at initial concentration of 10⁴ cells/mL [62] [63].
Data Acquisition & Quantification
Machine Learning Implementation
- Employ Gradient-Boosting Decision Tree (GBDT) algorithm for its high interpretability.
- Train model to predict A450 values based on medium compositions.
- Use active learning loop: prediction → experimental validation → model retraining.
Validation & Iteration
- Experimentally test 18-19 model-predicted medium combinations each cycle.
- Add results to training dataset and retrain model.
- Continue until performance plateaus (typically 3-4 cycles) [62].
Microfluidic Device Setup for Mammalian Cell Culture
Protocol: PDMS-Based Microfluidic Device Fabrication
Device Design
- Use CAD software to design microfluidic channel system and cultivation chambers.
- For 2D chambers: Ensure height ratio between channel and chamber restricts fluid flow to supply channels, allowing only diffusive mass exchange [20].
- Design supply channels wide enough to prevent clogging during cell loading.
Device Fabrication
- Create master wafer via photolithography, laser cutting, or stereolithography (3D printing) [20].
- Prepare PDMS by mixing base and curing agent, then cast onto master wafer.
- Cure at 65°C for 2+ hours, then peel off from master wafer.
- Create access ports via biopsy punch, then bond to glass slide using oxygen plasma treatment.
Device Preparation for Cell Culture
- For DMF systems: Create hydrophilic windows by locally removing ITO and hydrophobic layers to enable cell adhesion [4].
- Coat surface with cell adhesion proteins (e.g., fibronectin, collagen) as required by cell type.
- Sterilize using UV light or ethanol flushing followed by PBS rinsing.
Quantitative Data Reference
Table: Key Parameters for Active Learning Media Optimization
| Parameter | HeLa-S3 Protocol [62] | CHO-K1 Protocol [63] | Significance |
|---|---|---|---|
| Initial Medium Components | 29 | 57 | Defines optimization complexity |
| Initial Medium Combinations | 232 | 364 | Provides training dataset breadth |
| Performance Metric | A450 (NAD(P)H) | Cell concentration | Quantifies optimization success |
| Measurement Timepoint (Time-saving) | 96 hours | N/A | Enables faster iterations |
| Measurement Timepoint (Regular) | 168 hours | Culture-dependent | Standard endpoint measurement |
| Achieved Improvement | Significant NAD(P)H increase | ~60% higher concentration | Validation of method effectiveness |
Table: Microfluidic Flow Rate Considerations for Different Chamber Types
| Chamber Design | Recommended Flow Characteristics | Typical Applications | Cell Loading Considerations |
|---|---|---|---|
| 3D Cultivation Chambers | Lower flow rates; potential nutrient gradients | Tissue models, dense cultures | Easy seeding; difficult tracking [20] |
| 2D Cultivation Chambers | Moderate flow rates; diffusive exchange | Monolayer microcolonies | Easy seeding; superior imaging [20] |
| 1D Chambers (Mother Machine) | Continuous, stable flow | Multigenerational studies | Linear growth pattern [20] |
| 0D Single-Cell Chambers | Precise, low flow rates | Single-cell behavior analysis | Individual cell isolation [20] |
The Scientist's Toolkit: Essential Research Reagents & Materials
Table: Key Reagent Solutions for Microfluidic Cell Culture & Active Learning
| Item | Function/Purpose | Specifications & Alternatives |
|---|---|---|
| CCK-8 Assay Kit | Quantifies cellular NAD(P)H via A450 measurement | High-throughput alternative to haemocytometer [62] |
| PDMS | Microfluidic device fabrication | Biocompatible, transparent for imaging [20] |
| Flexdym Material | Alternative microfluidic substrate | Flexible, biocompatible, low autofluorescence [64] |
| GBDT Algorithm | White-box machine learning for optimization | Highly interpretable; identifies component contributions [62] |
| Serum-Free Medium Base | Starting point for formulation optimization | Enables precise component control [63] |
| DMF Chip with ITO Electrodes | Digital microfluidics platform | Enables droplet manipulation for automated culture [4] |
System Configuration & Workflow Integration
The following diagram shows the integration of microfluidic systems with the active learning optimization framework:
Troubleshooting Guide & FAQs
Evaporation Control
FAQ: Why is controlling evaporation so critical in my digital microfluidic (DMF) mammalian cell culture?
Evaporation from microdroplets is a major issue because it increases substance concentration, leading to distorted detection outcomes and triggering cell apoptosis. In severe cases, it can even cause droplet drive failure, compromising your entire experiment [65].
FAQ: What are the most effective strategies to minimize evaporation?
A combination of environmental control and chip design is most effective. The table below summarizes the quantitative impact of various factors on evaporation rates, showing that optimized conditions can reduce evaporation to 1/105 of the rate seen under poor conditions [65].
Table: Effect of Various Factors on Droplet Evaporation Rate in DMF
| Factor | Condition Leading to High Evaporation | Condition Leading to Low Evaporation | Impact on Evaporation Rate |
|---|---|---|---|
| Chip Encapsulation | Gap-type chip | Encapsulated chip | Major reduction with encapsulation |
| Humidity | 50% Humidity | 90% Humidity | Highest reduction factor observed |
| Temperature | 65°C | 37°C | Lower temperature reduces rate |
| Airflow/Wind Speed | 2 m/s | 0 m/s | Still air significantly reduces evaporation |
| Position in Incubator | Not specified | Top layer | Placing chips on the top layer is effective |
Troubleshooting Protocol: AI-Optimized Evaporation Control
For long-term cultures, advanced replenishment strategies can maintain stability.
- Implementation: Integrate a deep learning (DL) model for real-time droplet area detection on your DMF platform.
- Process: The AI system monitors droplet volume and triggers one of two intelligent replenishment strategies:
- Rapid Replenishment: For biochemical assays where concentration accuracy is key. This method improved lysine detection accuracy by 5 times.
- Precise Replenishment: For cell culture, where gradual, gentle medium addition is needed. This approach allowed Normal Human Dermal Fibroblast (NHDF) cells to survive for 4 days, whereas cells without replenishment died within 20 hours [65].
Biofouling Mitigation
FAQ: What is biofouling and how does it affect my microfluidic device?
Biofouling is the unwanted adhesion of biological material (proteins, cells) to microfluidic channel surfaces. It obstructs fluid flow, reduces pressure, and lowers the concentration of analytes in solution. This is especially problematic in microfluidics due to the high surface-area-to-volume ratio, and often forces you to stop experiments and clean components [66].
FAQ: How can I prevent biofouling in my cell culture experiments?
Mitigation involves both chemical treatments and physical surface modifications.
- Surface Modifications: Apply coatings or modify the channel surface to create a non-fouling, anti-adhesive layer. This is a primary method to resist fouling at its source [66].
- Operational Considerations: In Digital Microfluidics (DMF), biofouling can specifically occur on the upper plate. One effective strategy is to culture cells on the top plate by creating hydrophilic "windows" where the ITO and hydrophobic layers are locally removed, providing a dedicated, coatable surface for cell adhesion [4].
Table: Biofouling Mitigation Strategies
| Strategy Category | Specific Method | Mechanism of Action | Considerations |
|---|---|---|---|
| Surface Modification | Anti-fouling coatings | Creates a physical or chemical barrier that prevents cell/protein adhesion. | Requires compatibility with cells and solvents. |
| Device Architecture | DMF with hydrophilic windows [4] | Provides a defined, optimal surface for cell adhesion, reducing random fouling on active areas. | Requires design and fabrication steps. |
| Chemical Treatment | Chemical cleaning/washing | Removes fouling agents; most prominent method. | Has safety concerns; is a reactive, not preventive, measure. |
Preventing Channel Leakage
FAQ: My microfluidic connections keep leaking. Are there affordable ways to improve reliability?
Leakage often occurs at tubing connections and is a common failure point. A robust, low-cost method involves careful selection of tubing and connectors.
- Tubing & Connectors: Use a PMMA frame with holes to stabilize stainless-steel tubes mounted into the chip. This provides mechanical stability and prevents the tubing from shaking loose and causing leaks [67].
- System Calibration: Understand the pressure in your system. Using a calibration-based strategy to link channel geometry to the relationship between pressure drop (ΔP) and flow rate (Q) can help you pre-determine safe operating conditions and prevent pressure buildup that leads to connector leakage or chip failure [67].
Troubleshooting Protocol: Syringe-Driven Flow Calibration to Prevent Leakage
This protocol helps you establish safe pressure limits to prevent leakage and burst failures in syringe-driven systems [67].
- Characterize Your Chip: Calculate the hydraulic resistance (RH) of your microfluidic channel based on its geometry (Length L, Width W, Height H) and fluid viscosity (µ). The shape factor ε is min(W/H, H/W). ( R_H = \frac{12 μ L}{W \cdot H \cdot (min(W,H))^2 \cdot [1 - 0.6274ε \cdot tanh(\frac{π}{2ε})]} )
- Determine Safe Pressure-Flow Window: Using the calculated RH, determine the pressure (ΔP) needed for your desired flow rate (Q): ΔP = RH • Q.
- Operate Within Limits: Ensure your syringe-driven pressure source operates well within the calculated safe ΔP range to avoid over-pressurization, which is a primary cause of leakage and connector failure.
The Scientist's Toolkit: Essential Research Reagents & Materials
Table: Key Materials for Stable Microfluidic Mammalian Cell Culture
| Item | Function/Application | Key Details |
|---|---|---|
| Parylene C / SU-8 / PDMS | Dielectric layer in DMF chips. | Critical for electrode insulation. Material choice affects biocompatibility and device performance [4]. |
| Teflon AF / Cytop | Hydrophobic coating. | Reduces droplet contact angle and facilitates actuation at lower voltages in DMF [4]. |
| Indium Tin Oxide (ITO) Glass | Top plate/ground electrode. | Preferred for its transparency (for microscopy) and conductivity [4]. |
| Matrigel | 3D cell culture scaffold. | Used for embedding organoids and other 3D culture models in microfluidic devices [45]. |
| Advanced DMEM/F12 | Basal medium. | Used for tissue transport and as a base for organoid culture media, helping to maintain tissue viability before processing [45]. |
| ENR/R-spondin, Noggin, EGF | Growth factor supplements. | Critical for long-term expansion and maintenance of epithelial cell diversity in colon organoid cultures [45]. |
Benchmarking Performance and Validating Physiological Relevance
Quantitative Viability and Phenotype Assessment in Microfluidic Environments
Frequently Asked Questions (FAQs)
FAQ 1: Why are conventional cell viability assays like MTS often unsuitable for microfluidic 3D cell cultures?
Conventional bulk viability assays, such as MTS or Alamar Blue, rely on detecting metabolic products in the culture medium using spectrophotometry [68]. In microfluidic systems, the combination of minute cell numbers and continuous medium perfusion results in the concentration of these metabolic products falling below the detection limit of most spectrophotometers [68]. Furthermore, in compact 3D tissue cultures, it becomes difficult to segment and count individual cells using cytoplasmic metabolic dyes, making quantitative assessment challenging [68].
FAQ 2: How can I achieve single-cell resolution for viability counts in dense 3D microfluidic cultures?
The Quantitative Image-based Cell Viability (QuantICV) assay addresses this by using a pair of cell-impermeant nuclear dyes (such as EthD-1 and DAPI) instead of cytoplasmic metabolic dyes [68]. These dyes sequentially label the nuclei of necrotic cells and the total cell population. Because nuclei occupy only about 10% of the cell volume, they are easier to resolve spatially, even in tightly-packed 3D aggregates [68]. This method, combined with confocal microscopy and image processing, allows for accurate quantification of living and dead cells at single-cell resolution [68].
FAQ 3: What is the significance of single-cell phenotyping, and why is it important in drug development?
Cell populations are inherently heterogeneous, even when genotypically identical [69]. Traditional bulk measurements provide population-averaged readouts that can mask the presence of critical subpopulations [69] [70]. For instance, a small subset of cells might exhibit a severe drug response that is diluted out in an averaged result [70]. Single-cell phenotyping allows for the identification of these minority subgroups and a more precise understanding of cellular heterogeneity, which is crucial for developing effective and personalized therapeutic strategies [69] [70].
FAQ 4: What are some key considerations for maintaining a controlled microenvironment in microfluidic cell culture?
Culturing cells in microfluidic devices requires careful control of the cellular microenvironment, which includes soluble factors, cell-matrix interactions, and cell-cell contacts, all within a specific physicochemical context (pH, O₂, temperature) [71]. Key considerations include [71] [36]:
- Spatial and Temporal Gradients: Microfluidics excels at creating stable chemical gradients, which are important for studying migration and angiogenesis.
- Material Biocompatibility: While PDMS is common due to its transparency and biocompatibility, it can absorb small molecules; alternatives like polystyrene exist [36].
- Fluid Flow Control: Precise flow control is needed to provide nutrients and apply physiologically relevant shear stresses, but systems must be designed to avoid bubbles and leaks [36].
Troubleshooting Guides
Issue 1: Low or Unreducible Signal in Viability Assays
| Potential Cause | Diagnostic Steps | Corrective Action |
|---|---|---|
| Assay incompatibility | Review assay principle; check if it relies on medium accumulation of metabolites. | Switch to an image-based method like the QuantICV assay that does not require supernatant sampling [68]. |
| Cell number too low | Quantify the total number of cells loaded into the microfluidic device. | Pre-form 3D spheroids off-chip to ensure a sufficient, known cell number in the culture compartment [68]. |
| Probe transport issue | Verify flow is active; check for bubbles or blockages in tubing/channels. | Prime the system thoroughly; use bubble traps; ensure syringe pumps are functioning correctly [36]. |
Issue 2: Poor Cell Segmentation in 3D Image Analysis
| Potential Cause | Diagnostic Steps | Corrective Action |
|---|---|---|
| Use of cytoplasmic dyes | Inspect images; check if signal is diffuse with no clear cell boundaries. | Replace cytoplasmic dyes (e.g., Calcein AM) with nuclear dyes (e.g., DAPI, EthD-1) for distinct punctate signals [68]. |
| Insufficient z-resolution | Check confocal microscope settings and z-step size. | Use confocal microscopy and ensure z-stack intervals are small enough to resolve individual nuclei in 3D [68]. |
| High cell density | Visually assess the compactness of the 3D culture. | Optimize initial seeding density. If possible, use image processing algorithms designed to separate touching objects [68]. |
Issue 3: High Heterogeneity in Single-Cell Phenotypic Data
| Potential Cause | Diagnostic Steps | Corrective Action |
|---|---|---|
| Biological variation | Analyze data distributions for distinct subpopulations. | Embrace the heterogeneity; use multivariate analysis to identify and characterize subpopulations rather than averaging results [70]. |
| Non-biological noise | Check for inconsistencies in droplet sizes or probe concentration. | For droplet-based assays, ensure monodisperse droplet generation and uniform mixing of cells and probes [69]. |
| Environmental fluctuations | Monitor culture conditions (e.g., temperature, flow rate) over time. | Use microfluidic systems with integrated environmental controls to maintain a stable microenvironment [71]. |
Experimental Protocols & Data Presentation
Protocol 1: Quantitative Image-based Cell Viability (QuantICV) Assay
This protocol enables quantitative viability measurement in microfluidic 3D cultures [68].
- Staining Solution Preparation: Prepare a solution of a cell-impermeant nucleic acid dye (e.g., Ethidium Homodimer-1 (EthD-1)) in the cell culture medium to label necrotic cells.
- Necrotic Cell Staining: Introduce the EthD-1 solution into the microfluidic device and incubate to allow the dye to penetrate cells with compromised membranes.
- Cell Fixation and Permeabilization: Fix the cells with a suitable fixative (e.g., 4% PFA) and then permeabilize them (e.g., with 0.1% Triton X-100).
- Total Nuclear Staining: Introduce a second cell-impermeant nucleic acid dye (e.g., DAPI) that can now access all nuclei after permeabilization, labeling the total cell population.
- Image Acquisition: Acquire 3D z-stack images of the entire tissue construct using a confocal microscope.
- Image Analysis and Quantification:
- Use software to count the EthD-1-positive nuclei (necrotic cells).
- Count the DAPI-positive nuclei (total cells).
- Calculate viability: % Viability = [(Total DAPI+ cells - Total EthD-1+ cells) / Total DAPI+ cells] * 100.
Protocol 2: Droplet-Based Phenotyping of Single Cells
This method quantifies the concentration and heterogeneity of cells possessing a specific phenotype [69].
- Probe Selection: Choose a fluorogenic probe or live-dead indicator (e.g., alamarBlue, fluorogenic enzyme substrates) specific to the phenotype of interest (e.g., enzyme activity, metabolic function).
- Device Priming: Load the continuous phase (a biocompatible oil like HFE-7500 mixed with a surfactant, e.g., 1-2% EA-surfactant) into the droplet generation device [69].
- Droplet Generation: Inject the aqueous cell suspension and the probe solution as separate dispersed phases into a flow-focusing microfluidic droplet generator. This co-encapsulates single cells and probes into monodisperse aqueous droplets (~16-75 pL in volume) within the oil [69].
- Incubation: Collect the droplets and incubate them for a predetermined time to allow the encapsulated cells to act on the probe.
- Fluorescence Detection: After incubation, flow the droplets through a detection region (e.g., on a microscope or in a flow cytometer) to measure fluorescence.
- Data Analysis:
- The fraction of fluorescent droplets corresponds to the concentration of cells with the target phenotype.
- The distribution of fluorescence intensity across droplets reflects the heterogeneity in phenotypic expression among the cell population [69].
Quantitative Data from Key Studies
Table 1: Comparison of Viability Assay Performance in Microfluidic Cultures.
| Assay Method | Readout | Suitable for 3D Cultures? | Single-Cell Resolution? | Key Advantage |
|---|---|---|---|---|
| MTS / AlamarBlue [68] | Colorimetric / Fluorometric (bulk) | No (Challenging) | No | Well-established, easy in macroscale |
| Conventional Live/Dead [68] | Imaging (cytoplasmic dyes) | Qualitative only | No (in compact 3D) | Provides spatial information |
| QuantICV Assay [68] | Imaging (nuclear dyes) | Yes | Yes | Enables quantification in dense 3D tissues |
Table 2: Key Reagent Solutions for Microfluidic Viability and Phenotyping.
| Research Reagent | Function / Application | Example(s) |
|---|---|---|
| Cell-impermeant Nuclear Dyes (e.g., DAPI, EthD-1) [68] | Distinguish necrotic vs. total cell populations in the QuantICV assay; allows cell segmentation. | EthD-1 (labels necrotic nuclei), DAPI (labels all nuclei after permeabilization). |
| Fluorogenic Enzyme Substrates [69] | Report on specific enzyme activities (a phenotype) at the single-cell level inside droplets. | CDG-OMe (for β-lactamase BlaC activity in TB diagnosis). |
| Redox Indicators (e.g., alamarBlue) [69] | Act as a live-dead indicator by measuring metabolic activity, a common phenotype. | Used to quantify metabolically active E. coli in droplets. |
| Biocompatible Oil & Surfactant [69] | Forms the continuous phase for droplet microfluidics; stabilizes droplets against coalescence. | HFE-7500 oil with EA-surfactant (PEG-PFPE block copolymer). |
Visualizations: Workflows and Pathways
Diagram 1: QuantICV Assay Workflow
Diagram 2: Single-Cell Droplet Phenotyping
This technical support center provides troubleshooting guides and FAQs for researchers integrating microfluidic mammalian cell cultures and benchmarking results against traditional static cultures and animal models.
Troubleshooting FAQs
FAQ: Our microfluidic 3D culture results show different drug responses compared to traditional static 2D cultures. How should we interpret this?
- Potential Cause: The differences may reflect the superior physiological relevance of 3D microfluidic cultures, not experimental error. Static 2D cultures lack cell-cell and cell-extracellular matrix interactions, changed cell morphology and polarity, and have unlimited nutrient access unlike physiological conditions [72].
- Solution: Validate the microfluidic results against known physiological data or clinical outcomes. The table below summarizes expected differences and their interpretations when comparing these models [72] [73].
| Observation in Microfluidic 3D vs. Static 2D | Potential Interpretation |
|---|---|
| Reduced drug efficacy | Better mimicry of physiological tissue barriers and penetration |
| Altered gene expression profiles | More native-like cell topology and biochemistry |
| Different metabolic activity | Variable nutrient access creating physiological gradients |
FAQ: Our organ-on-chip toxicity data contradicts earlier animal study results. Which data is more reliable?
- Potential Cause: Species-specific differences may make human-derived organ-on-chip data more predictive for human responses. A study showed a human Liver-Chip correctly identified 87% of drugs causing human liver injury, despite these drugs passing animal tests [73].
- Solution: Correlate organ-on-chip findings with known human data. Consult FDA pilot programs like ISTAND, which has accepted the first Organ-Chip model for regulatory evaluation, indicating growing acceptance of this data [73].
FAQ: We observe high variability in organoid size and response in our microfluidic cultures. How can we improve reproducibility?
- Potential Cause: Inconsistent culture conditions: Traditional dynamic 3D methods (e.g., orbital shakers) can introduce high shear forces, while static methods suffer from diffusion limitations [74].
- Solution: Implement clinostat-based bioreactors that provide low-shear, gravity-neutral environments. Studies show this reduces size coefficient of variation below 10% [74]. Ensure standardized protocols for cell sources, matrices, and medium perfusion rates.
FAQ: Cells in our digital microfluidic (DMF) device show reduced viability after electrical actuation. How can we mitigate this?
- Potential Cause: Effects from the actuation electric fields or magnetic fields (magnetic flux density can range from -5 to -7 ppm in droplets), which can affect sensitive cell types [4].
- Solution: Optimize actuation parameters (voltage, frequency). Use appropriate dielectric layers (e.g., parylene C) and hydrophobic coatings (e.g., Teflon AF) to insulate cells. Always include a viability control experiment with non-actuated cells [4].
FAQ: How do we address reviewer concerns that our microfluidic model lacks full organism complexity?
- Acknowledge the Limitation: Be transparent that single-organ systems cannot capture full neuro-immune or endocrine integration [74].
- Mitigation Strategy: Position the work as a specialized human-relevant model. For systemic questions, plan studies using multi-organ-chip systems. Use computational tools to integrate data from multiple organoid models [74].
Quantitative Benchmarking Data
The following tables summarize key performance and predictive metrics for different culture models, aiding in data interpretation and experimental design.
| Feature | Traditional 2D Static | 3D Static / Scaffold | Microfluidic (e.g., DMF, Organ-Chip) | Animal Models |
|---|---|---|---|---|
| Physiological mimicry | Low; lacks tissue structure | Moderate; 3D architecture | High; can incorporate flow, mechanical forces | High; whole organism |
| Cell-cell / cell-ECM interactions | Deprived | Present, can be engineered | Present, can be dynamically controlled | Native |
| Nutrient / Gradient access | Unlimited, non-physiological | Diffusion-limited, can form gradients | Perfusion-controlled, physiological gradients | Physiological |
| Throughput & cost | High throughput, low cost | Moderate throughput & cost | Moderate to high throughput, variable cost | Low throughput, high cost |
| Species specificity | Human cells possible | Human cells possible | Human cells possible | Limited (non-human) |
| Typical culture duration | Days to weeks | Weeks | Up to 60 days (DMF) [4] | Weeks to months |
| Metric | Traditional 2D | 3D Spheroids | Liver-Chip (Emulate) | Animal Models |
|---|---|---|---|---|
| Predictive accuracy for DILI* (% correct) | Not reported | Lower than Liver-Chip | 87% (n=18 drugs) | Less than Liver-Chip |
| Typical experiment duration | 1-7 days | 7-28 days | 1-7 days (chip culture) | 1-12 months |
| Relative cost for screening | $ (Low) | $$ (Medium) | $$-$$$ (Medium-High) | $$$$$ (Very High) |
| Cell number per sample | 10^4 - 10^5 | 10^3 - 10^4 | 10^3 - 10^5 | N/A |
*DILI: Drug-Induced Liver Injury
Experimental Protocols for Benchmarking
Protocol: Direct Drug Response Comparison (2D vs. Microfluidic 3D)
This protocol uses the VersaLive platform [75] to compare drug responses directly.
- Step 1: Device Preparation: Fabricate or acquire a VersaLive chip (5 chambers, PDMS-glass). Sterilize (e.g., autoclave, UV).
- Step 2: Cell Seeding:
- For 2D Control: Seed cells in a standard well-plate.
- For VersaLive 3D: Load cell suspension (~1000-5000 cells/μL) into the main channel in "single-input perfusion mode." Allow cells to enter chambers and adhere for several hours in "static mode."
- Step 3: Drug Application & Live-Cell Imaging:
- For 2D Control: Add drug dilutions to respective wells.
- For VersaLive 3D: Switch to "multi-input mode." Add different drug concentrations to individual input reservoirs (e.g., control medium to chambers #2 and #4, drug to #1, #3, #5). Place chip on microscope stage for time-lapse imaging (e.g., 20h at 15-min intervals).
- Step 4: Endpoint Analysis: Fix and stain for markers (e.g., viability, apoptosis) directly on-chip. For recovery, trypsinize and flush out cells.
Protocol: Validating Organ-Chip against Animal Toxicology Data
This protocol benchmarks a Liver-Chip against historical animal data [73].
- Step 1: Chip Conditioning: Use a human Liver-Chip. Establish a stable, functional culture of primary human hepatocytes with relevant non-parenchymal cells under physiological flow for 5-7 days. Monitor albumin/urea production.
- Step 2: Drug Exposure: Select compounds with known human and animal toxicity profiles (e.g., drugs that passed animal tests but failed in humans). Perfuse drugs at a clinically relevant concentration for 5-7 days. Include negative/positive controls.
- Step 3: Metric Assessment: Measure classic toxicology endpoints: ATP levels (cell viability), ALT/AST release (cytotoxicity), albumin synthesis (function), and histology.
- Step 4: Data Correlation: Compare chip data to existing animal and human data. The chip is considered more predictive if it correctly identifies human toxicants that were missed in animal studies.
The Scientist's Toolkit
Research Reagent Solutions
| Item | Function & Application | Example/Notes |
|---|---|---|
| PDMS (Polydimethylsiloxane) | Elastomer for rapid prototyping of gas-permeable microfluidic devices [75] [20] | VersaLive platform [75] |
| Matrigel / Hydrogels | Basement membrane extract for 3D cell culture scaffolds; supports complex tissue formation [72] | Contains endogenous bioactive factors [72] |
| Parylene C / SU-8 | Dielectric layer insulation in DMF chips; protects cells from electric fields [4] | Critical for cell viability in DMF [4] |
| Teflon AF / Cytop | Hydrophobic coating for DMF chips; reduces actuation voltage and facilitates droplet movement [4] | - |
| Clinostat-based Bioreactor | Provides low-shear, gravity-neutral environment for highly reproducible 3D organoid culture [74] | E.g., CelVivo's ClinoStar [74] |
Experimental Workflow & Signaling Pathways
Microfluidic Benchmarking Workflow
The diagram below outlines a logical workflow for benchmarking microfluidic cell culture models against traditional standards.
Integrated Stress Response (ISR) Pathway Example
This pathway can be used as a benchmark readout in microfluidic models, as demonstrated with a CHO-K1 reporter cell line [75].
Leveraging Real-Time, Non-Invasive Monitoring with Integrated Sensors and Microscopy
Integrating real-time, non-invasive monitoring technologies is transforming microfluidic-mammalian cell culture research. This approach combines label-free sensor data with traditional microscopy, enabling researchers to observe cellular dynamics over long periods without the risk of dye-induced cytotoxicity or cell photodamage associated with continuous fluorescent imaging [76]. Mastering this integration is crucial for advanced applications like organ-on-chip studies and high-throughput drug screening, but it introduces new technical challenges in data correlation, system setup, and interpretation.
Frequently Asked Questions (FAQs)
Q1: What are the primary advantages of non-invasive electrical sensing over live-cell fluorescence microscopy? Electrical Impedance Spectroscopy (EIS) is label-free, eliminating risks of dye-induced cytotoxicity and cellular photodamage. It allows for prolonged, real-time monitoring of cellular processes like adhesion, proliferation, and spatial heterogeneity without altering the native cell environment [76].
Q2: My EIS data shows unexpected noise. What could be causing interference in my readings? Signal noise can originate from multiple sources: air bubbles trapped in microfluidic channels, biofouling on electrode surfaces, fluctuations in temperature or pressure from the flow control system, or electrical interference from other laboratory equipment. Ensure all connections are secure and implement pressure sensors with feedback loops to maintain stable flow conditions [77].
Q3: How can I correlate sensor data with visual cell morphology from microscopy? Synchronize data acquisition by using software that timestamps both impedance measurements and captured images. For accurate correlation, it is critical to validate that cell density and behavior on the sensor surface are representative of the imaged areas adjacent to the electrodes [76].
Q4: What steps can I take to prevent contamination in long-term microfluidic cell cultures? Strengthen aseptic techniques by using sterile, single-use reagents and consumables. Implement strict biosafety protocols for handling, and design microfluidic systems with minimal dead volume and sealed connections. Regularly test for mycoplasma and other common contaminants [78].
Q5: Can I use integrated sensor networks to track more than just cell position and size? Yes. Code-multiplexed Coulter sensor networks can transduce spatial cell manipulation into electrical signals, enabling the tracking of properties like cell surface expression, mechanical properties, and immunophenotype based on the cell's motion within the device [79].
Troubleshooting Guides
Problem 1: Poor Correlation Between Sensor Data and Microscopy Images
Symptoms: Discrepancies between predicted cell density from EIS models and actual microscope observations; inability to track single-cells reliably.
| Potential Cause | Solution | Reference |
|---|---|---|
| Spatial mismatch between sensor location and imaged area. | Validate that cell density on electrode surfaces is representative of the surrounding imaged area by fixing and staining cells at the experiment's end. | [76] |
| Low signal-to-noise ratio in sensor readings. | Introduce redundancy and error-correction codes into the sensor network design to resolve ambiguous signals from coincident cell detections. | [79] |
| Inconsistent cell seeding across the device. | Standardize cell seeding protocols and use surfactants or coatings to promote even cell distribution. | [78] |
Problem 2: Unstable Microfluidic Flow Conditions
Symptoms: Fluctuating baseline in sensor readings; irregular cell movement; failure to maintain consistent droplet volumes in Digital Microfluidics (DMF).
| Potential Cause | Solution | Reference |
|---|---|---|
| Pressure drops within the microfluidic system (connectors, tubing, chips). | Integrate one or more pressure sensors into the setup to create a feedback loop for fine-tuned, real-time pressure control. | [77] |
| Evaporation of droplets in DMF platforms, affecting concentration and flow. | Ensure the top plate of the DMF device is properly sealed and use humidity control chambers to minimize evaporative loss. | [4] |
| Biofouling of channels and electrodes. | Incorporate anti-fouling coatings and establish regular cleaning-in-place protocols if the system design allows. | [4] |
Problem 3: Low Cell Viability or Unnatural Cell Behavior
Symptoms: Cells detaching, showing abnormal morphology, or failing to proliferate as expected in the microfluidic environment.
| Potential Cause | Solution | Reference |
|---|---|---|
| Shear stress from improper flow rates. | Use pressure-based flow controllers for smoother, more physiologically relevant flow profiles compared to syringe pumps. | [77] [4] |
| Cytotoxicity from fluorescent dyes during long-term live-cell imaging. | Switch to a label-free monitoring method like EIS for the majority of data acquisition, using microscopy only for key validation time points. | [76] |
| Incompatible device materials or dielectric layers. | For DMF, select biocompatible materials like parylene C or silicon nitride for the dielectric layer, and Teflon AF for the hydrophobic coating. | [4] |
Monitoring Technologies: A Data Comparison
The table below summarizes key quantitative data from recent studies on non-invasive monitoring platforms, providing benchmarks for your own experimental setup.
Table 1: Comparison of Integrated Monitoring Technologies and Performance
| Technology | Key Measured Parameters | Reported Performance / Metrics | Cell Types Used in Study |
|---|---|---|---|
| EIS with Machine Learning [76] | Cell density, covered area fraction, mean cell diameter, cell type classification. | ML model trained on >30,000 paired EIS/image datasets; tracked spatiotemporal dynamics for 44+ hours. | MCF10A (normal breast epithelial), MCF7 (cancerous breast epithelial). |
| Code-Multiplexed Coulter Sensor Network [79] | Cell size, flow speed, spatiotemporal location. | Network of 10 integrated sensors; error-correction enabled reliable decoding of coincident cell detection. | Human ovarian cancer cells (HeyA8). |
| AI-Driven Image Analysis [78] | Cell morphology, proliferation, viability, early-stage contamination. | Reduced variability in analysis by up to 90%; improved culture success rates by at least 40%. | Not specified (general cell culture). |
| Digital Microfluidics (DMF) [4] | Automated droplet handling, response to biochemical stimuli. | Enabled long-term culture studies up to 60 days; typical droplet supports 500–1000 cells. | Mammalian cells (e.g., for liver organ-on-chip models). |
Detailed Experimental Protocols
Protocol 1: Real-Time Monitoring of Cellular Spatiotemporal Dynamics using EIS and ML
This protocol enables non-invasive, label-free tracking of co-culture dynamics, such as interactions between normal and cancerous epithelial cells [76].
Research Reagent Solutions & Essential Materials
| Item | Function / Explanation |
|---|---|
| Microelectrode Array (MEA) Platform | A 25-electrode pair device for spatiotemporal acquisition of EIS signals. |
| Cell Culture Media | Standard media for monocultures; a 50:50 mixture of both media for co-cultures. |
| IC Fixation Buffer | Used for fixing cells when required; preferred over formaldehyde for certain fluorescent labels. |
| Superfrost Plus Microscope Slides | Charged slides that provide reliable cell adhesion without additional coating for validation studies. |
| Machine Learning Software | Custom deep learning model for predicting cell parameters from EIS data. |
Methodology
- Device Preparation: Use a fabricated 25–electrode pair MEA platform.
- Cell Seeding and Culture:
- For monocultures: Seed MCF10A (normal) and MCF7 (cancerous) cells in separate devices.
- For co-cultures: Seed cells in specific spatial configurations (e.g., bilateral or concentric patterns).
- Simultaneous Data Acquisition:
- Acquire EIS spectra from all electrode pairs at set intervals.
- Simultaneously capture bright-field and fluorescence microscopy images of areas adjacent to the electrodes.
- Image Analysis and Model Training:
- Use a trained Cellpose model for automated segmentation of microscopy images to extract ground-truth parameters (cell density, covered area, mean diameter).
- Pair these parameters with the synchronized EIS measurements in space and time.
- Train a deep learning model on this large dataset (e.g., >30,000 pairs) to predict cellular parameters from EIS data alone.
- Validation: Fix and immunostain cells at the end of experiments to confirm that cell density on electrodes matches the surrounding imaged areas.
Protocol 2: Simplified Cell Preparation for Functional Tests and Microscopy
This cost-effective method prepares cells in suspension for microscopy without a cytospin, preserving fragile cell morphology during functional assays [80].
Methodology
- Slide Preparation: Rinse Superfrost Plus charged microscopy slides with DI water and let them dry flat in a biological safety cabinet under UV light.
- Cell Staining & Treatment: Stain cells (e.g., murine splenocytes) with fluorescent antibodies in Falcon tubes following flow cytometry protocols. Incubate with compounds of interest (e.g., fluorescent oligonucleotides).
- Time-Series Sampling: At each time point (e.g., 15, 30, 60 min), withdraw a 10 µL aliquot from the cell suspension.
- Slide Creation: Place the 10 µL aliquot on the prepped slide and gently smear it using the side of a pipette tip.
- Heat-Fixing: Place the slide on a hot plate (55–60 °C) for 20 minutes, protected from light. This evaporates excess liquid and fixes the cells without centrifugation.
- Staining and Mounting: Draw a hydrophobic barrier around the sample, fix with an appropriate buffer (if needed), and mount with a DAPI-containing mounting medium for imaging.
The Scientist's Toolkit: Visualization of Workflows
EIS and ML Integration Workflow
Sensor Network Error Correction
The integration of microfluidic technologies with mammalian cell culture represents a significant advancement in the development of physiologically relevant in vitro models. Three-dimensional (3D) spheroids have emerged as a critical tool in oncology research and drug development, as they better mimic the complex architecture and microenvironment of solid tumors compared to traditional two-dimensional (2D) cultures [81] [82]. These multicellular aggregates replicate key features of in vivo tumors, including nutrient and oxygen gradients, the presence of quiescent and proliferating cell populations, and enhanced cell-cell and cell-extracellular matrix (ECM) interactions [83] [84].
However, the path to developing a robust and validated 3D spheroid model, particularly within microfluidic systems, is fraught with technical challenges. Issues with reproducibility, model characterization, and assay compatibility often hinder their widespread adoption in preclinical research [85] [84]. This case study details the successful development and validation of a novel co-culture spheroid model designed for the study of pancreatic ductal adenocarcinoma (PDAC), and provides a comprehensive technical support framework for troubleshooting common experimental hurdles. The content is framed within a broader thesis on troubleshooting microfluidic-mammalian cell culture integration, aiming to equip researchers with practical solutions to advance their work in this promising field.
Experimental Protocol: Development of a PDAC Co-culture Spheroid Model
Key Research Reagent Solutions
The following table details the essential materials and reagents used in the successful development of the PDAC spheroid model, along with their critical functions.
Table 1: Essential Research Reagents for 3D Spheroid Development
| Reagent/Material | Function in the Protocol |
|---|---|
| Low-Attachment 96-Well Plates (e.g., Corning Spheroid Microplates, Nunclon Sphera) | U-shaped well geometry and ultra-low attachment surface promote consistent spheroid formation by minimizing cell adhesion [86] [87]. |
| Extracellular Matrix (ECM) Components (e.g., Matrigel, Geltrex, Collagen I) | Provides a scaffold that mimics the tumor microenvironment; enhances spheroid compaction and density [85] [87]. |
| Pancreatic Ductal Adenocarcinoma (PDAC) Cell Lines (e.g., PANC-1, BxPC-3) | Represents the cancerous component of the model, allowing for the study of different PDAC genotypes and phenotypes [85]. |
| Human Pancreatic Stellate Cells (hPSCs) | Serves as the stromal component, co-cultured with PDAC cells to recapitulate the tumor microenvironment and model cancer-associated fibroblast (CAF) activity [85]. |
| Cell Culture Media & Supplements | Supports long-term culture and differentiation; specific growth factors and cytokines may be required for co-culture systems [87]. |
| CellTiter-Glo 3D Cell Viability Assay | A specially formulated lytic reagent for 3D models that ensures complete penetration and accurate ATP-based viability measurement [83]. |
Detailed Methodology
The following workflow was established for the consistent generation of PDAC spheroids, adapted from a recently published study [85].
- Cell Preparation: Culture PANC-1 (KRASG12D mutant) and BxPC-3 (wild-type KRAS) PDAC cell lines, along with human Pancreatic Stellate Cells (hPSCs), under standard conditions.
- Co-culture Seeding: Mix PDAC cells and hPSCs in the desired ratio. For PANC-1:hPSC spheroids, prepare the cell suspension in a medium supplemented with 2.5% Matrigel to ensure proper compaction. For BxPC-3:hPSC spheroids, use a Matrigel-free medium to avoid irregular morphology.
- Spheroid Formation: Seed the cell suspension into a low-attachment 96-well plate. Centrifuge the plate to force cells into close proximity and encourage initial cell-cell contact.
- Incubation and Monitoring: Incubate the plate under standard tissue culture conditions. Monitor spheroid formation and growth over 10 days using a live-cell analysis system (e.g., Incucyte).
- Validation and Assaying: Once spheroids are formed (typically by day 2-5), treat them with compounds or nanocarriers. Use validated assays like CellTiter-Glo 3D for viability testing and light sheet microscopy for penetration studies.
The diagram below illustrates the key decision points and outcomes in the spheroid formation workflow.
Quantitative Model Characterization Data
A critical step in model validation is the quantitative assessment of spheroid morphology and growth dynamics. The data below summarizes the key characteristics of the two PDAC models developed.
Table 2: Quantitative Characterization of PDAC Spheroid Models
| Parameter | PANC-1:hPSC Spheroid (with 2.5% Matrigel) | BxPC-3:hPSC Spheroid (Matrigel-free) |
|---|---|---|
| Initial Diameter (Day 2) | ~500 µm | ~300 µm |
| Final Diameter (Day 10) | ~1000 µm (growth observed) | ~300 µm (stable size) |
| Morphology | Dense and uniform | Dense and uniform |
| Key ECM Additive | Matrigel (2.5% conc.) | None |
| Optimal Testing Window | Days 2-10 | Days 2-5 (debris observed after Day 5) |
| Notable Characteristics | Steady growth over time; requires ECM for compaction | Spontaneous compaction without ECM; limited lifespan |
This quantitative profiling is essential for experimental planning, ensuring that drug treatments or nanocarrier penetration studies are conducted on mature, stable spheroids that accurately represent the desired tumor biology [85].
Troubleshooting Guides and FAQs
Spheroid Formation and Morphology
Q1: My cells are not forming a compact spheroid and instead remain as a loose aggregate. What could be the cause? A: This is a common issue often linked to cell type or culture conditions.
- Cell-Specific Adhesion: The inherent cell-to-cell adhesion properties vary by cell line. Cells with high E-cadherin expression typically form compact spheroids, while those with low expression may form loose aggregates [84]. Consult literature for your specific cell line.
- ECM Supplementation: For cells that naturally form loose aggregates (e.g., PANC-1), supplementing the medium with a low concentration of an ECM protein like Matrigel (e.g., 2.5%) can dramatically improve compaction and density [85].
- Seeding Density: Optimizing the initial cell seeding number is critical. Too few cells may not form a spheroid, while too many can lead to necrosis or inconsistent sizes [87].
Q2: How can I control the size and uniformity of my spheroids for high-throughput screening? A: Reproducibility is key for screening.
- Specialized Microplates: Use ultra-low attachment plates with round or U-bottom wells. The geometry confines cells to a small area, promoting the formation of uniformly-sized spheroids [86] [82].
- Centrifugation: A brief centrifugation step after seeding, as used in the featured protocol, forces cells together, synchronizing the start of spheroid formation and improving size uniformity [85].
Microfluidic Integration and Cultivation
Q3: What are the primary challenges when cultivating spheroids in microfluidic devices? A: Microfluidic cultivation (MC) introduces unique challenges related to device operation and cell handling [20].
- Device Loading and Bubbles: Priming the device and loading cells without introducing air bubbles is critical, as bubbles can block channels and trap cells, leading to device failure.
- Cell Trapping and Clogging: The microfluidic design must be optimized for the size and type of cells used. Channels that are too narrow can clog during loading, while improper chamber design may fail to reliably trap cells or spheroids [20].
- Shear Stress: The continuous flow of medium, while beneficial for nutrient supply, can exert shear stress on cells. The flow rate must be carefully controlled to avoid dislodging spheroids or damaging cells [20].
Q4: How can I achieve reproducible trapping of spheroids in a microfluidic chip? A: Reproducible trapping is fundamental for long-term studies.
- Hydrodynamic Trapping: This is the most common approach. The chip design should incorporate cultivation chambers (e.g., 2D or 3D chambers) where fluid dynamics naturally guide and retain spheroids without physical constriction that could cause damage [20].
- CFD Simulations: Using Computational Fluid Dynamics (CFD) simulations during the chip design phase can help predict and optimize flow patterns for reliable cell trapping and nutrient supply [20].
Assay and Analysis
Q5: Why do my viability assay results seem inaccurate when testing 3D spheroids? A: Standard assays optimized for 2D cultures often fail to penetrate the dense core of 3D spheroids.
- Penetration Failure: The dense ECM and tight cell-cell contacts in spheroids act as a barrier. Standard lytic reagents cannot access all cells, leading to an underestimation of viability [83].
- Solution: Use assays specifically validated for 3D cultures, such as CellTiter-Glo 3D. These contain enhanced detergents and require longer incubation times to ensure complete lysis and accurate ATP measurement [83].
Q6: What is the best way to image the internal structure of a large spheroid? A: Standard confocal microscopy has limited penetration depth in large, dense spheroids.
- Light Sheet Microscopy: For studying the internal penetration of nanocarriers or antibodies, light sheet fluorescence microscopy (LSFM) is superior to confocal microscopy. It provides optical sectioning with less phototoxicity and deeper effective penetration [85].
- Clearing Reagents: For fixed spheroids, using commercial clearing reagents (e.g., Corning 3D Clear, CytoVista) can render the spheroid optically transparent, allowing for clearer visualization of internal structures with standard confocal microscopes [86] [87].
The successful development and validation of a 3D spheroid model require a meticulous approach to protocol design, characterization, and troubleshooting. This case study demonstrates that by understanding the specific requirements of different cell lines, optimizing ECM composition, and employing appropriate analytical techniques, researchers can create robust models that closely mimic in vivo tumor biology. The integration of these models with microfluidic platforms, while challenging, offers unparalleled control over the cellular microenvironment, paving the way for more predictive preclinical drug screening and a deeper understanding of cancer biology. The troubleshooting guidelines provided here serve as a foundational resource for scientists navigating the complexities of microfluidic-mammalian cell culture integration, ultimately contributing to more efficient and successful research outcomes.
Conclusion
The successful integration of microfluidic systems with mammalian cell culture is not merely a technical exercise but a gateway to generating more predictive and physiologically relevant data. By mastering the foundational principles, implementing robust methodologies, proactively troubleshooting common pitfalls, and rigorously validating system performance, researchers can fully leverage this powerful technology. Future advancements will be driven by the increased adoption of user-friendly, automated systems; the integration of machine learning for real-time process optimization; and the development of sophisticated multi-organ chips. Embracing these tools and strategies will significantly accelerate drug discovery, enhance the accuracy of toxicity testing, and pave the way for more effective personalized medicine approaches, ultimately bridging the critical gap between traditional in vitro models and in vivo physiology.
References
- 1. 2D Versus 3D Cell Cultures: Advantages and Disadvantages [https://www.mimetas.com/en/blogs/315/2d-versus-3d-cell-cultures-advantages-and-disadvantages.html]
- 2. 3D Cell Culture: development, challenges, and future trends [https://www.worldhealthexpo.com/insights/medical-laboratory/3d-cell-culture-development-challenges-and-future-trends]
- 3. Mammalian cell culture and analysis in digital microfluidic ... [https://pubs.rsc.org/en/content/articlelanding/2025/lc/d5lc00250h]
- 4. Mammalian cell culture and analysis in digital microfluidic ... [https://pubs.rsc.org/en/content/articlehtml/2025/lc/d5lc00250h]
- 5. Using a Microfluidic Device for High-Content Analysis of Cell ... [https://pmc.ncbi.nlm.nih.gov/articles/PMC3918417/]
- 6. A Novel Single-Layer Microfluidic Device for Dynamic ... [https://pmc.ncbi.nlm.nih.gov/articles/PMC12293461/]
- 7. An artificial intelligence-assisted digital microfluidic system ... [https://www.nature.com/articles/s41378-024-00775-5]
- 8. Advanced design and applications of digital microfluidics in ... [https://www.sciencedirect.com/science/article/abs/pii/S0956566323006656]
- 9. Nucleic acid amplification tests in digital microfluidics [https://www.nature.com/articles/s41378-025-00977-5]
- 10. A digital microfluidic approach to increasing sample ... [https://pubs.rsc.org/en/content/articlelanding/2025/lc/d4lc01002g]
- 11. Properties and Applications of PDMS for Biomedical ... [https://pmc.ncbi.nlm.nih.gov/articles/PMC8788510/]
- 12. Microfluidic cell culture [https://www.sciencedirect.com/science/article/abs/pii/S0958166913006794]
- 13. Biocompatibility of Liquid Silicone Rubber (LSR) [https://www.simtec-silicone.com/blogs/biocompatibility-of-liquid-silicone-rubber-lsr/]
- 14. Sorption and release of small molecules in PDMS ... [https://www.nature.com/articles/s41598-025-97111-2]
- 15. Comparison of biocompatibility and adsorption properties ... [https://pubmed.ncbi.nlm.nih.gov/22444457/]
- 16. PDMS absorption of small molecules and ... - PubMed [https://pubmed.ncbi.nlm.nih.gov/17203151/]
- 17. PDMS: The Versatile Polymer for Microfluidic Chips [https://elveflow.com/microfluidic-reviews/the-polydimethylsiloxane-pdms-and-microfluidics/]
- 18. Development of robust biocompatible silicone with high ... [https://www.sciencedirect.com/science/article/abs/pii/S1742706111000602]
- 19. PDMS SlipChip: Optimizing Sealing, Slipping, and ... [https://pmc.ncbi.nlm.nih.gov/articles/PMC12114323/]
- 20. How to Perform a Microfluidic Cultivation Experiment—A ... [https://pmc.ncbi.nlm.nih.gov/articles/PMC8699335/]
- 21. Advantages and challenges of microfluidic cell culture in ... [https://www.sciencedirect.com/science/article/pii/S0956566314005302]
- 22. Re-imagining human cell culture media: Challenges, ... [https://www.sciencedirect.com/science/article/abs/pii/S0734975025000503]
- 23. current obstacles and future developments in cell culture [https://pmc.ncbi.nlm.nih.gov/articles/PMC7333579/]
- 24. Microfluidic devices for cell cultivation and proliferation - PMC [https://pmc.ncbi.nlm.nih.gov/articles/PMC3829894/]
- 25. Microfluidic Customer Support for Your Needs [https://elveflow.com/elveflow-support/]
- 26. Support - EDEN TECH [https://eden-microfluidics.com/support/]
- 27. Advances in passively driven microfluidics and lab-on-chip ... [https://pubs.rsc.org/en/content/articlehtml/2020/ra/d0ra00263a]
- 28. Fluid flow to mimic organ function in 3D in vitro models - PMC [https://pmc.ncbi.nlm.nih.gov/articles/PMC10404142/]
- 29. Microfluidic Capture Device for Simple, Cell Surface ... [https://link.springer.com/article/10.1007/s13206-024-00142-6]
- 30. A High-Throughput Microfluidic Platform for Mammalian ... [https://www.nature.com/articles/srep23937]
- 31. Perfusion Media Exchange Strategies: Reducing Shear ... [https://cellculturecompany.com/perfusion-media-exchange-strategies-reducing-shear-stress-and-maximizing-output/]
- 32. Optimising and adapting perfusion feeds in serum-free ... [https://pmc.ncbi.nlm.nih.gov/articles/PMC12171161/]
- 33. A modular and reconfigurable microfluidic device for culturing ... [https://pmc.ncbi.nlm.nih.gov/articles/PMC12352930/]
- 34. How to Perform a Microfluidic Cultivation Experiment—A ... [https://www.mdpi.com/2079-6374/11/12/485]
- 35. Cell Culture Troubleshooting Guide [https://www.thermofisher.com/us/en/home/references/gibco-cell-culture-basics/cell-culture-troubleshooting/cell-culture-troubleshooting-guide]
- 36. Microfluidic cell culture - a beginner friendly review [https://elveflow.com/microfluidic-reviews/microfluidic-cell-culture-a-review/]
- 37. The VersaLive platform enables microfluidic mammalian ... [https://www.nature.com/articles/s42003-022-03976-8]
- 38. Overcoming Challenges of Cell Culture Monitoring [https://cellculturecollective.com/blog/overcoming-challenges-of-cell-culture-monitoring/?srsltid=AfmBOoqG4tWZTRYY_G2yoiPh-6gifYQwblQg2zrwDW9auheUBYVA8-YX]
- 39. Implement Strategies to Prevent Persistent Medication ... [https://home.ecri.org/blogs/ismp-alerts-and-articles-library/implement-strategies-to-prevent-persistent-medication-errors-and-hazards-2024]
- 40. Overcoming Challenges of Cell Culture Monitoring [https://cellculturecollective.com/blog/overcoming-challenges-of-cell-culture-monitoring/?srsltid=AfmBOoo0A8ab6Pn91nh4UjK6UDXU4J9r1oiWG9gx0aNQ8JguSYSMX7v1]
- 41. Mammalian Cell Culture Basics Support—Troubleshooting [https://www.thermofisher.com/us/en/home/technical-resources/technical-reference-library/cell-culture-support-center/mammalian-cell-culture-basics-support/mammalian-cell-culture-basics-support-troubleshooting.html]
- 42. Mastering Mammalian Cell Culture Maintenance: A Guide ... [https://cellculturecompany.com/mastering-mammalian-cell-culture-maintenance-a-guide-for-biomedical-researchers/]
- 43. Tumor organoid-immune co-culture models: exploring a ... [https://www.nature.com/articles/s41420-025-02407-x]
- 44. Key aspects for conception and construction of co-culture ... [https://www.frontiersin.org/journals/bioengineering-and-biotechnology/articles/10.3389/fbioe.2023.1150764/full]
- 45. A Practical Guide to Developing and Troubleshooting Patient ... [https://pmc.ncbi.nlm.nih.gov/articles/PMC12566426/]
- 46. Modeling cancer-microbiome interactions in vitro: A guide ... [https://pubmed.ncbi.nlm.nih.gov/39716471/]
- 47. Air bubbles and microfluidics, how to deal with it [https://elveflow.com/microfluidic-reviews/air-bubbles-and-microfluidics/]
- 48. Bubble removal in microfluidic channels surrounded by gas ... [https://pubs.rsc.org/en/content/articlehtml/2025/lc/d5lc00407a]
- 49. Development of a Microfluidics-Based Approach for ... [https://pubmed.ncbi.nlm.nih.gov/40522870/]
- 50. MIT engineers solve the sticky-cell problem in bioreactors ... [https://news.mit.edu/2025/mit-engineers-solve-sticky-cell-problem-bioreactors-and-other-industries-1015]
- 51. Bubble-driven cell detachment - PMC [https://pmc.ncbi.nlm.nih.gov/articles/PMC12526770/]
- 52. Design, fabrication, and decontamination of low-cost ... [https://www.sciencedirect.com/science/article/pii/S2666053925000724]
- 53. Microfluidic vessel-on-chip platform for investigation of cellular ... [https://pubs.rsc.org/en/content/articlehtml/2025/lc/d4lc00824c]
- 54. Shear stress in microfluidic devices [https://blog.darwin-microfluidics.com/shear-stress-in-microfluidic-devices/]
- 55. Why Control Shear Stress in Cell Biology? [https://www.fluigent.com/resources-support/expertise/expertise-reviews/microfluidic-cell-biology/controling-shear-stress/]
- 56. A Cell-Based Sensor of Fluid Shear Stress for Microfluidics [https://pmc.ncbi.nlm.nih.gov/articles/PMC4443851/]
- 57. Cell Culture Contamination | Thermo Fisher Scientific - US [https://www.thermofisher.com/us/en/home/references/gibco-cell-culture-basics/biological-contamination.html]
- 58. How to Clean Your Microfluidic Chip: A Comprehensive ... [https://blog.darwin-microfluidics.com/how-to-clean-your-microfluidic-chip/]
- 59. 3D Printing of Cell Culture Devices: Assessment and ... [https://www.mdpi.com/1996-1944/13/13/3011]
- 60. Microfluidic perfusion for dynamic cell culture [https://elveflow.com/microfluidic-applications/microfluidic-perfusion-for-dynamic-cell-culture/]
- 61. Standalone cell culture microfluidic device-based ... [https://pubs.rsc.org/en/content/articlehtml/2024/lc/d3lc00934c]
- 62. Employing active learning in the optimization of culture ... [https://pmc.ncbi.nlm.nih.gov/articles/PMC10229643/]
- 63. Biology-aware machine learning for culture medium ... [https://www.sciencedirect.com/science/article/pii/S1871678425000731]
- 64. Microfluidic Cell Culture : Alternative to PDMS & Design [https://eden-microfluidics.com/news-events/microfluidic-cell-culture-alternative-to-pdms-and-microfluidic-design/]
- 65. AI-optimized evaporation control in digital microfluidics for ... [https://www.sciencedirect.com/science/article/abs/pii/S0925400525007932]
- 66. -on-a-chip: Mechanism and Mitigation of Lab (2024) Biofouling [https://scispace.com/papers/lab-on-a-chip-mechanism-and-mitigation-of-biofouling-3ap8evqocv2e]
- 67. Affordable method for channel geometry–specific flow ... [https://www.nature.com/articles/s41598-025-24442-5]
- 68. Quantitative Image-Based Cell Viability (QuantICV) Assay for ... [https://pmc.ncbi.nlm.nih.gov/articles/PMC7407956/]
- 69. Quantifying phenotypes in single cells using droplet ... [https://pmc.ncbi.nlm.nih.gov/articles/PMC6880865/]
- 70. Microfluidics-enabled phenotyping of a whole population ... [https://www.nature.com/articles/s41378-018-0003-8]
- 71. Fundamentals of microfluidic cell culture in controlled ... [https://pmc.ncbi.nlm.nih.gov/articles/PMC2967183/]
- 72. 2D and 3D cell cultures – a comparison of different types of ... [https://pmc.ncbi.nlm.nih.gov/articles/PMC6040128/]
- 73. The Role of Complex In Vitro Models in IND Submissions ... [https://emulatebio.com/role-of-complex-in-vitro-models-in-ind-submissions/]
- 74. Blog: Refining Biomedical Research Beyond Animal Models [https://celvivo.com/blog-refining-biomedical-research-beyond-animal-models/]
- 75. The VersaLive platform enables microfluidic ... mammalian cell culture [https://www.nature.com/articles/s42003-022-03976-8?error=cookies_not_supported&code=57fc8e47-d8fb-4366-9616-a4fa0abdd6a5]
- 76. Noninvasive real-time monitoring of cellular spatiotemporal ... [https://pmc.ncbi.nlm.nih.gov/articles/PMC12266097/]
- 77. Understanding and Managing Pressure in Microfluidic ... [https://elveflow.com/microfluidic-applications/pressure-sensor-feedback-loop/]
- 78. Overcoming Challenges of Cell Culture Monitoring [https://cellculturecollective.com/blog/overcoming-challenges-of-cell-culture-monitoring/?srsltid=AfmBOoqy9MKZTiINxiAqNSixZeRoZiU08sVYztnFFuRQ_TvdyOyi7TW-]
- 79. Integrated sensor networks with error correction for ... [https://www.sciencedirect.com/science/article/abs/pii/S0956566320308046]
- 80. New Approaches to Old Techniques in Cell Handling for ... [https://www.mdpi.com/2073-4409/14/16/1271]
- 81. Three-Dimensional In Vitro Tumor Spheroid Models for ... [https://pmc.ncbi.nlm.nih.gov/articles/PMC10571930/]
- 82. Spheroids - 3D Cell Models [https://www.moleculardevices.com/applications/3d-cell-models/spheroids]
- 83. The Promises and Challenges of 3D Models [https://www.promega.com/resources/pubhub/features/the-promises-and-challenges-of-3d-models/]
- 84. Challenges of applying multicellular tumor spheroids in ... [https://cancerci.biomedcentral.com/articles/10.1186/s12935-021-01853-8]
- 85. A 3D spheroid model for assessing nanocarrier-based ... [https://www.nature.com/articles/s44385-025-00041-x]
- 86. 3D Spheroid Models - Cell Culture Applications [https://www.corning.com/worldwide/en/products/life-sciences/applications/cell-culture/3D-cell-culture/spheroid-models.html]
- 87. 5 steps to creating 3D cell culture models [https://www.thermofisher.com/us/en/home/life-science/cell-culture/organoids-spheroids-3d-cell-culture/5-steps-creating-3d-cell-models.html]